Wednesday, March 31, 2010

shutters

I can't wait to show you my latest project.

It involves this:


and this:


and a whole lot of this:


Doin' man's work (as my three year old puts it.)

I built me some new shutters... (all by my stinking self) and I couldn't be more proud of these babies! Our house is getting a little make-over and I think were it's going is going to be good for it! I can't wait to see the final result.

I built them on Saturday, the plan was to hang them on Monday, but the wind was blowing like a crazy tornado (or something) and then it rained and snowed all day today. So if when the sun comes out, the hubby and I are going to be climbing the ladder and drilling holes into our new house (scary!) to put these babies up! I promise, it's going to look sooooo good!

Hopefully you'll see it finished before the weekend (weather permitting).

until then, I thought I would leave you with something pretty. (and completely unrelated.)
Some (more) white kitchen love...

from Better Homes and Gardens (Sept 2007)


Thursday, March 25, 2010

window pane picture frame

I have lots of projects right now in various stages of completion. I'll get to all of them when I can, but for now, here's a little project I've wanted to do for a while now.

About a year and a half ago, I was looking for a architectural salvage window pane I searched for a few months, I brought it up with my Grandpa one day last year. He was really good at finding "junk". He told me he would keep his eyes open. A few weeks later, we had family over for my little boy's birthday party, and he came in carrying a window pane just like I had been looking for.

He made it himself.

For me.

I was thrilled and it's one of my favorite pieces of decor in my home. My Grandpa just passed away in January. It's been a hard thing for me. He was a special guy...


In our old house I mounted it above the sofa in the living room. When we moved here around Halloween, I decided to put it above the desk (which is in the living room until the basement is finished and we have an office again.) I liked it there, but didn't feel like it was living up to it's potential.


I had black and white images in it that where over a year old and I was kind of getting tired of them.


I decided to swap them out for these color images instead...

and turn it the other direction. I put it right in my entry way and now it's the first thing you see when you walk through the front door.


It makes me happy every time I pass by it.

I've thought a little about what makes houses feel comfortable and "homey" and this is something that for me does. It's filled with pictures of my kids that make me happy, my boys playing outside on warm summer days, swinging, holding bugs, eating apples in an orchard, and just being themselves. The colors are bright and fun, and most of all, I think of my Grandpa Jay every time I walk past it. That makes it perfect to me.

If you're looking for a window or a door like this, but don't have the luck of having a grandpa Jay to make one for you, I have a few ideas on where to find one. Consignment stores frequently carry them, I've found that sometimes consignment shops charge a lot for them though. You would be better off going to a salvage yard if you have one near your home, unfortunately for me I don't. You could look online, I found a few on ebay that where going for between $50-$100, but be prepared to pay a lot for shipping, they're heavy.

Or if you are super lucky, you'll be like my sister in-law, who found one in the garage of the house she bought a while ago. Can't beat that!

my FLOR has arrived!


First of all, remember back in February how I actually got lucky and won something? It was a big deal... I really don't ever win anything, so I was super excited.


I won a free FLOR rug from Chris @ Just a Girl.

It took me several weeks to choose the rug.

Believe me, I have a hard time making decisions. When we go out to eat I will stare at a menu for a really long time, then usually narrow it down to two or three choices and then make my husband pick from those choices for me, I just a have a hard time making little choices like that. I always second guess myself.

So sending me to the FLOR website and making me choose ONE rug from all of those possibilities was really tough. really tough.


I stewed over it every night for several weeks. Finally my husband forced encouraged me to just pick one. So I did. I chose "rake me over" in lime. And as soon as I clicked the button I knew I made the wrong choice, so I hurried and sent an email to a nice lady named Gina (thanks, Gina!) who was my contact and changed it to "corrugated rib" in Brooke, which is a really soft blue with a tinge of sea foamy green in it.

It goes well with everything you can see from the entry way, and I like how it picks up the blues in the living room rug.

And how it coordinates with my blue, green and white striped rug by the door:


It came some time last week, it only took about a week from when I placed my order. The carpet tiles where all stacked in a box, so it wasn't a big awkward package. It also came with these great adhesive dots to stick to the bottom so it won't slide around. I haven't done that yet... just in case I decide to move it.

I tried it out in lots of different places, the kitchen, the hallway as a runner, I even tried it in our bedroom on top of the carpet just for kicks. I decided I liked it best in the entry way. I'm so happy with it that I would order from FLOR in the future. (they didn't pay me to say that, and I would have won the rug regardless, I really mean it.)

Thanks to Chris and Flor for such a great give away!

Friday, March 19, 2010

little bookshelf fixer-upper


I found this little bookshelf on my local classifieds listing for $15. Initially, I liked the shape of it, it was the right size and it's solid wood. So I decided it would be worth investing some time to fix it up.

I should have taken a more dramatic before picture, or used the one from the ad posting, it really needed some love.


It was pretty easy. All I did was remove the original backing, which turned out to be a sheet of real wood, so it didn't crumble the way cardboard or particle board would have.


I bought some tongue and groove bead bord panels that where pre-packaged and cut to 32" long, which was perfect for my bookshelf, all I had to do was rip one of the pieces so it was the right width. I measured and cut a new shelf for where it was missing one, painted it all with white high gloss paint (for kids things it's the only way to go, it cleans up so much better) and nailed the bead board onto the back.


The bead board may not seem like it made the hugest difference, but I think it did. It gave it a lot more character and looks so much better than just the plain white panel back.


By the time it was all said and done the whole thing came in around $35. Not too shabby. And a whole lot more fun than just going out and buying what I wanted, for sure!


see the rest of his room here

Tuesday, March 16, 2010

great exteriors

I have a serious house fixation.
I love houses.

I love insides and outsides.

I've fallen in love with many a great house.

I will frequently take the long way just to drive by a house I love, or plan my running route around a way that I know has pretty houses that I like to look at. (That doesn't make me a nut, right?)

Lucky for me, I married a guy that likes houses too. He will humor me when I want to take the long way. We have "dream house" discussions all of the time, and he not only listens, he participates and adds ideas too. He's perfect for me, that's for sure.

We started adding to our "someday" house file right before we were engaged. It started with one picture of a house we saw and loved (and tried to discreetly snap without making anyone think we were terrorists or stalkers, hence the van blocking the garage!)


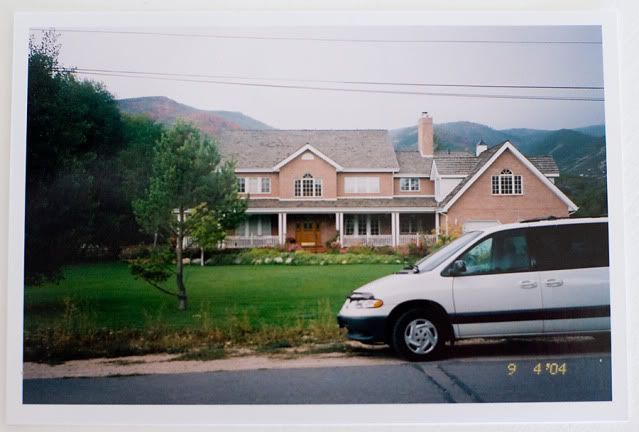
Our preferences have changed in the almost 6 years since then, I wouldn't choose that exact same thing now, but I still love the basic idea and shape of it... and it kind of leads into what I love now days, so that's the fun of it, I guess.

That file has grown, and we now have a big one on our computer and a paper file with pictures, sketches, and torn out magazine pages. Having a house file has really helped me to see what our style is, just by looking at the pages and images we've collected. I'll talk more about the file later, I'll show it to you in another post.

Anyway... my dream house...

I don't think I ever want a huge grand house. My dream house is a casual, comfortable home with lots of architectural details, lots of white trim, and warm inviting spaces suited for a family (with small boys I might add.)


Here are a few favorites lately:
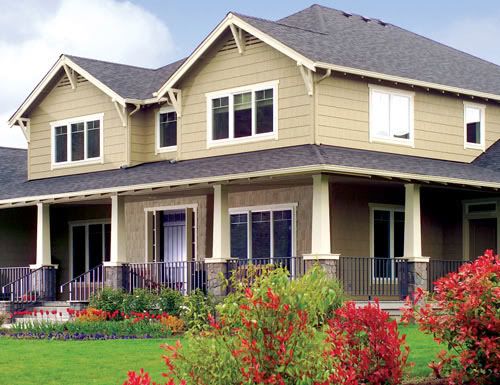
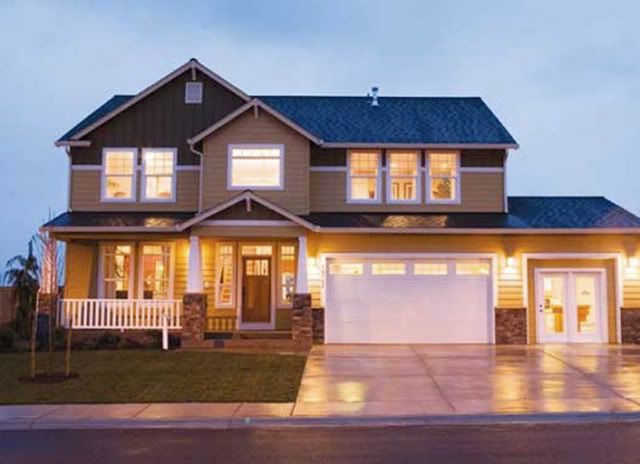
This one is my #1 favorite right now.

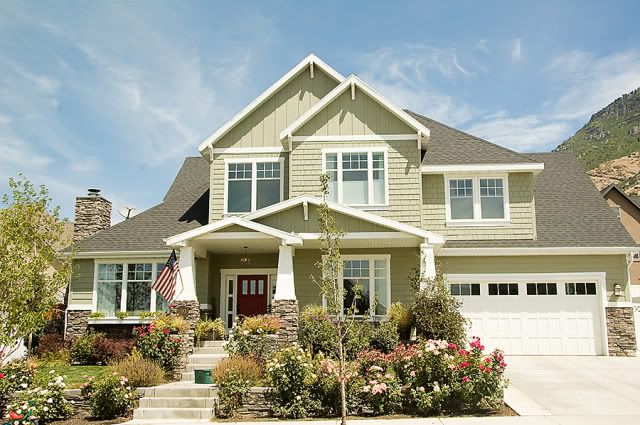
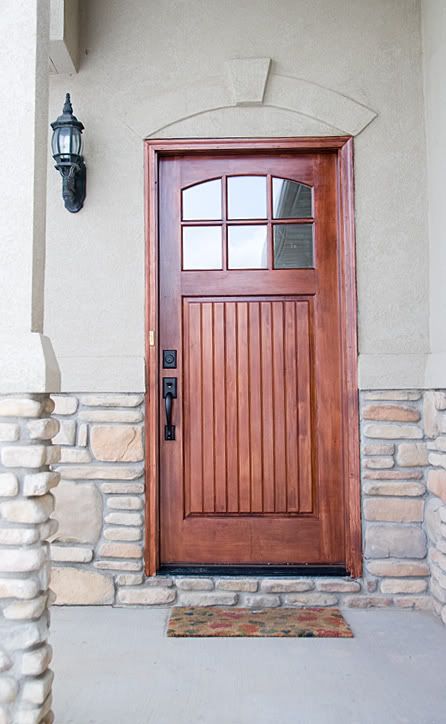
I love that it doesn't look like every other house, I love the craftsman elements, the tapered columns are my favorite. I love the shingle style siding (rather than typical Utah stucco.) The colors are fun, it's visually pleasing. The front door is perfect for it. I *love*, love, LOVE this house.
I think this house should win a prize or something. Isn't it great?

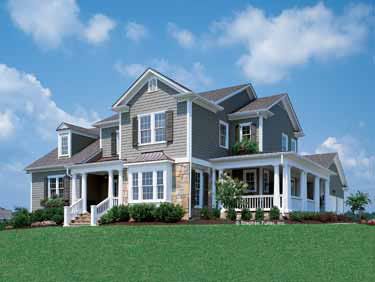
Here's my #2 right now.

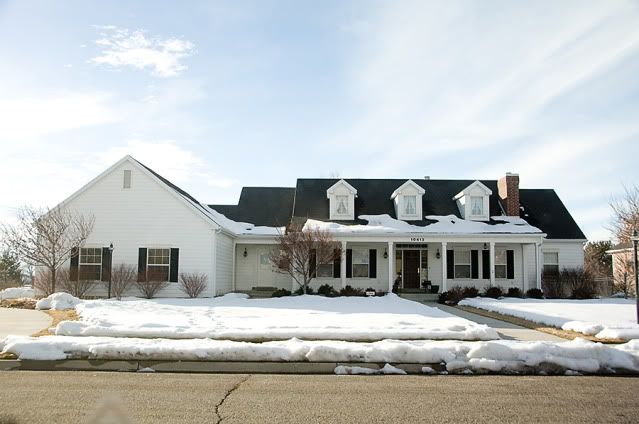
This cape cod style is just down the street from our home. It's fairly new, but has lots of "old house" character (another thing on my dream house list.) It's timeless. Every time we drive by I tell my Hubby I want to build a house similar to this one. It's simple and I love the big porch. Maybe you can't tell, but the front door is red. If it where my little house, I would want the inside to be kind of farm style.

Oh! And check out the back...

It's gorgeous when it's not snowy... the landscaping is amazing. I envision my daughter's wedding in the back yard with pretty paper lanterns and twinkly lights... but wait...I'm getting ahead of myself... I don't have a daughter yet. :)
Oh well, someday, right?
I think the back of this house is just as charming as the front.

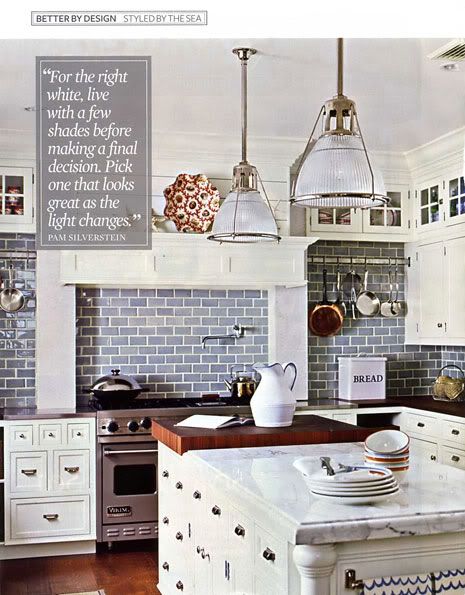
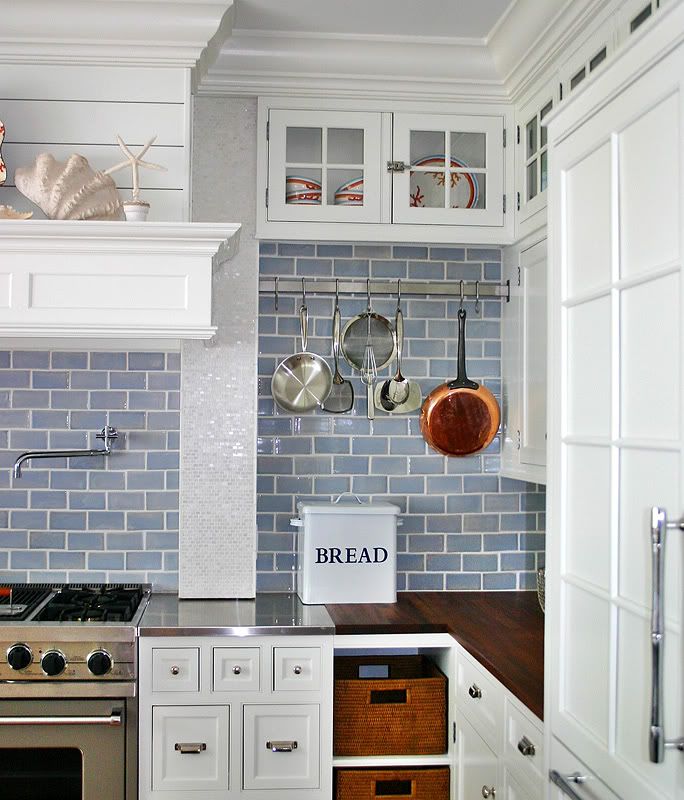
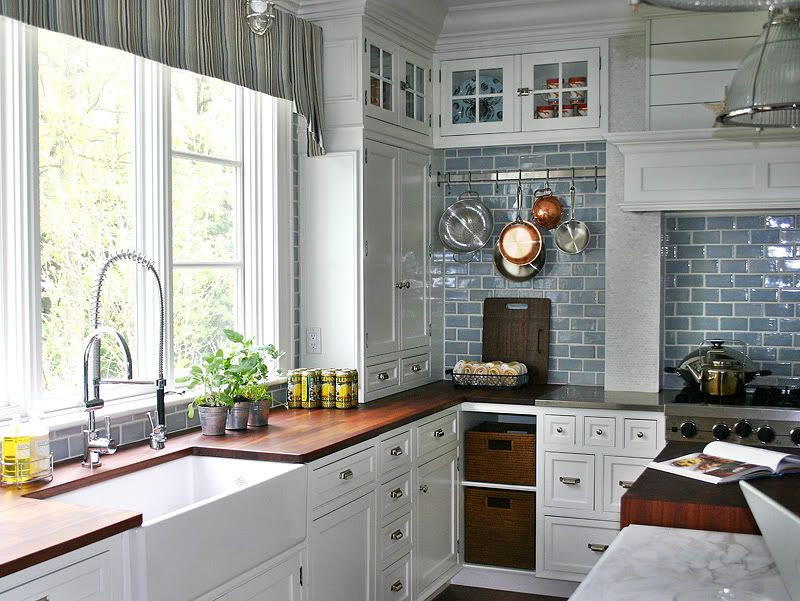
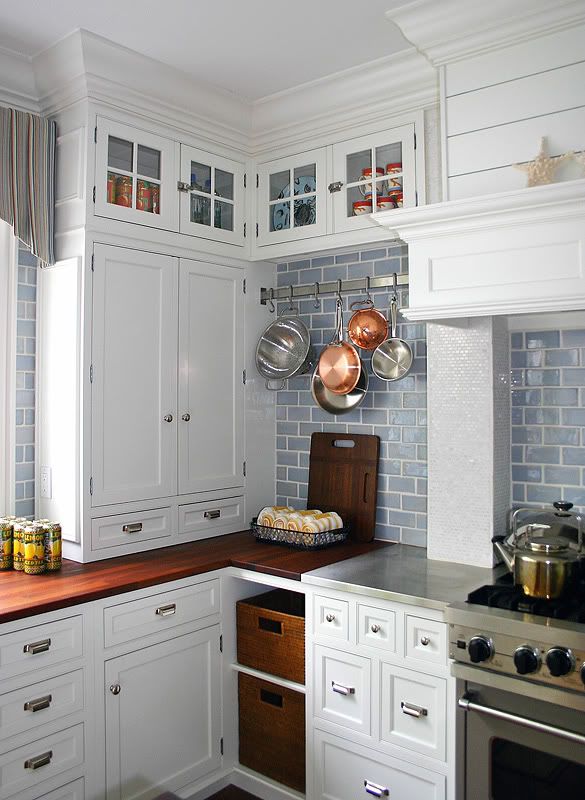
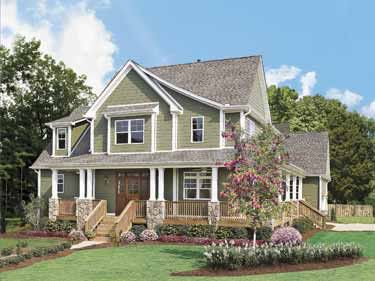
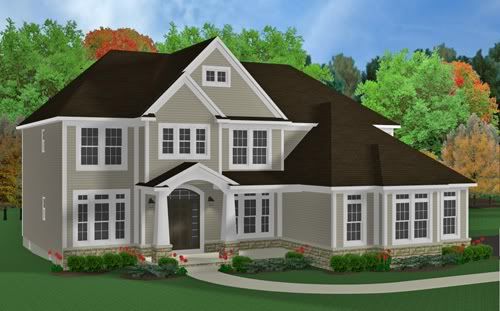
And here's the part where I bombard you with 9 billion images from my dream house file... I love different elements of all of these beauties.


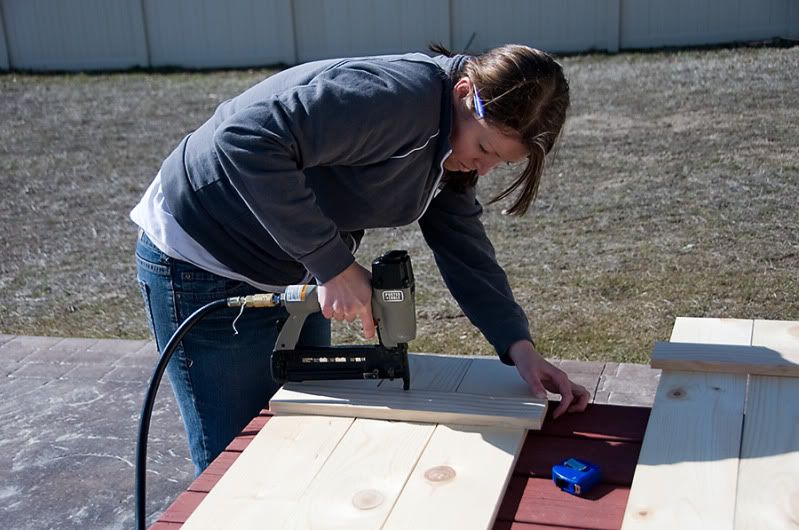
And right now we're thinking of a way to add a little of this...

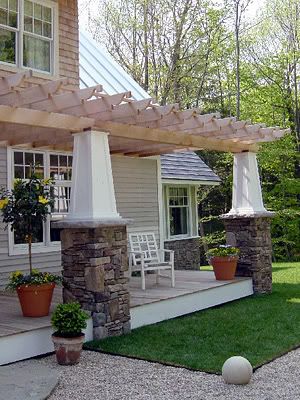
to our back patio. LOVE IT!

We've only been in our new home for 4 months or so, and I'm not planning on another move any time soon. It's plenty big enough for us, 3400 square feet for our little family is enough. I'm happy with what I have for now. I'm content to work on it and make it how we like it, but it's not the "end all" house for us. It's fun to dream and plan for our "someday" house.

It made me giggle when two people in the last month drove by our house and un-discreetly snapped a picture out the window... only because I can totally relate, and I've been that crazy person before... although my house isn't setting the bar very high... yet. We'll get it looking good soon enough. :)

So how about the rest of you? Are there any other house crazies out there? Do you ever drive or walk the long way just to see a great house, or un-discreetly drive by and take a sneaky picture of a house you love? Do you have a favorite architectural style or a dream house file?

Monday, March 8, 2010

back door window treatment


Believe it or not, this project was 100% NO SEW. And very very easy.

I'll show you how...


For starters, when we moved in, the back door was covered with these vertical blinds that didn't really do anything good for the kitchen or the door.

I found a pair of red sailcloth curtains on clearance at the good old Target in January for $11. I decided we couldn't beat that. The colors throughout most of my house are red, a limey green, and a few different shades of blue (aquas, turquoise and light blue) But we have mostly blues and greens going on. I thought the red would be fun.
Here's what it looked like from the very first phase:


The red tab curtains where better than the plain old vertical blinds, but they just didn't do it for me. So I brainstormed and searched for the perfect coordinating fabric.


When I found it, I turned them into this:


By adding fabric to the top and hanging the curtain rod higher, it gives the illusion that the windows are larger. Let the curtains hang all the way to the floor, these even bunch at the bottom a tiny bit, which I may or may not change. For now they're fine.

I cut the tabs off, going for a more tailored look and used metal clampy ring things to hang them. I think they add a nice touch.

First of all... make sure the fabrics you choose are of similar weight. I found a nice woven fabric that was identical in feel and weight to the sailcloth. This will ensure that it lays as it should. My fabric just happened to be a remnant left on the roll at JoAnn's, so they gave it to me for 50% off the 40% off sale price... you follow me? That made it about $6.00 for nearly a yard. It should have cost a little over $20/yard!

So the first step was to use a seam ripper to remove the tabs. They came right off, and where attatched in such a way that you couldn't even tell that I took them off and a nice hemmed edge was left. I actually flipped the panel and used that for the bottom of my curtain.

Next, if you haven't used stitch witchery, I suggest now would be a good time to get acquainted with your new best friend. It's really easy to use, comes in various widths and bond strengths.


This is perfect for making hems where you don't want a seam to show. If you can iron, you can use this stuff.


Next I ironed a nice hem line all around the patterned fabric.


Then attached the patterned piece to the sailcloth.

Ironed both sides really well to make sure the bond was secure.
I used the factory perfect hem on the bottom of the original panel for detail on the top of my new panel where the two fabrics meet.

And that was really all there was to it.

Could I have just sewn it? Yes, and originally that was the plan, but my sewing machine was having a mechanical problem so I improvised. I think it ended up working out really well though, and I ended up really liking the no seam look.


Here's the larger view of the colors in the kitchen (there is a bright green rug behind the camera by the fridge that you can't see as well.)


I went to target today to exchange a bike helmet for my little boy and found these beauties on clearance for $7.99. They bundled two of them together too! (they were originally sold separately. I still don't get why they did it that way, but it worked out well for me!) I'm thinking another set will be coming to my living room soon!

Wednesday, March 3, 2010

knock-off vintage alarm clock

I've wanted to get rid of our ugly alarm clock that we've had since the beginning of time (aka 2004).


I've been eyeing a pretty little clock like this:


Pottery Barn Charleston Clock $39.

I love the classic simplicity of it. This is what I'm going for.


Not this:


I hated putting it on our new dresser, and I cringe every time I have to look at it. I hate the sound it makes in the morning and I want to throw it every time it goes off.

Anybody out there with me? I promise, our alarm clock sound is one of the worst.

Anyway, I did find the same pretty clock for a little less at the Down East Home store (they sell overstocked and damaged Pottery Barn goods, as well as some other brands). Their price was just under $20. I was hoping to score a better deal than that, so I patiently waited.

Until today...

Today I was at the good old WAL-MART looking for fabric dye. They didn't have the color I wanted, but I did find some clearanced home items, among them, this:


For $2.97!!!


Yes, $2.97! The only problem was the brassy finish (even though that's coming back a bit, I just can't embrace it yet.) So I decided for $2.97, would be willing to take it in and give it a cheap make-over.

Enter Rustoleum.


This $3 can of spray paint gave me the clock I wanted for just under $6.00!

I just used painters tape to cover the face, I used my fingernail to kind of cut and shape the tape around the crack surrounding the face, if you don't have fingernails you could always just use a little knife or sharp tool, I would just be careful not to press too hard.

I took it outside and sprayed it on a piece of newspaper while my kids where napping, left it in the sun to dry for a bit and
voila!


One Pottery Barn knock-off vintage looking alarm clock for under $6!


And I think I might actually like mine better, it does have those cool little bell thingy's, after all!