I made a little goal for myself that the four hours a week when my oldest boys are at preschool, that I'll try really hard not to use that time for cleaning, or other household chores. I decided that I need to use that time for creating, since these days I don't get as much of that as I would like. The addition of our third little fella has been wonderful, I can't get enough of him, but I'm still working on achieving balance all over again.
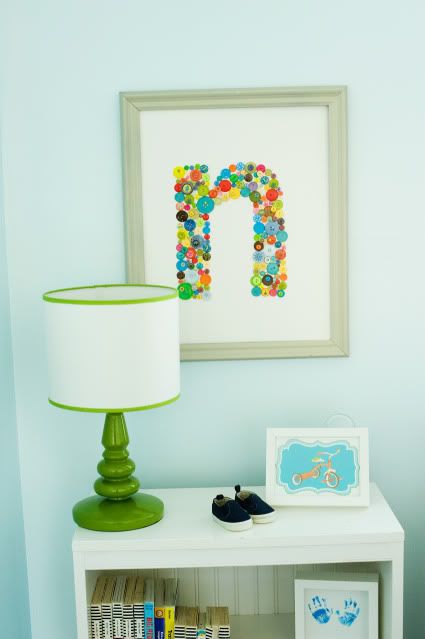
This is one of my little creations during preschool/momma project time.
My favorite section is this little part with the little "n" that looks like a typewriter letter. See it down there?


 Since I'm only working with a two hour time slot (they go for two hours on Tuesday and two hours on Thursdays) I didn't want to waste time taking pictures of the process, but here are the details:
I started with:
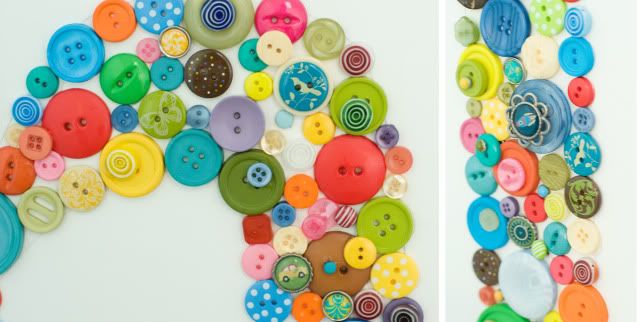
* a big 16x20 piece of art board or mat board. It needs to be thick to hold the weight of the buttons and glue.
* glue. I think it was 3m project glue or something like that. I bought it at Target. It dries in less than a minute. Bonds paper, plastic metal, etc. Tacky glue would work. Maybe hot glue, although it would make a stringy mess.
* Buttons and brads. lots and lots of buttons. A few scrap book elements and brads to fill in and add depth and dimension, and a few glass beads for fun.
I free handed a lower case "n" for my baby Noah. I just drew it on with pencil. Then I did a rough lay out of where the buttons should go. This took a while, but it was actually pretty therapeutic. Playing with bright colorful buttons is a great stress reducer!
It was pretty easy, and I love the playful color it adds to his room. I'm pretty darn close to finishing up the odds and ends and calling his room finito.
Idea from American Crafts, go here for more details.