Thursday, February 25, 2010

under the stairs playhouse thoughts

We are in the process of finishing our second basement.

We finished our last one just months before moving. I didn't even have it decorated yet. We are a couple of crazies, that's for sure.

We had this great little "playhouse" under the stairs in our old house.


... and we loved it. I built those shutters all by myself... no man powers involved. I used the nail gun and everything. I was pretty proud of it. I wasn't finished with it. I had plans to make it look like a real house, a little lantern on the side by the door, a little mail box, an adress on the side, you know... oh and by the way, where was I going with all of that crazy color on the walls?
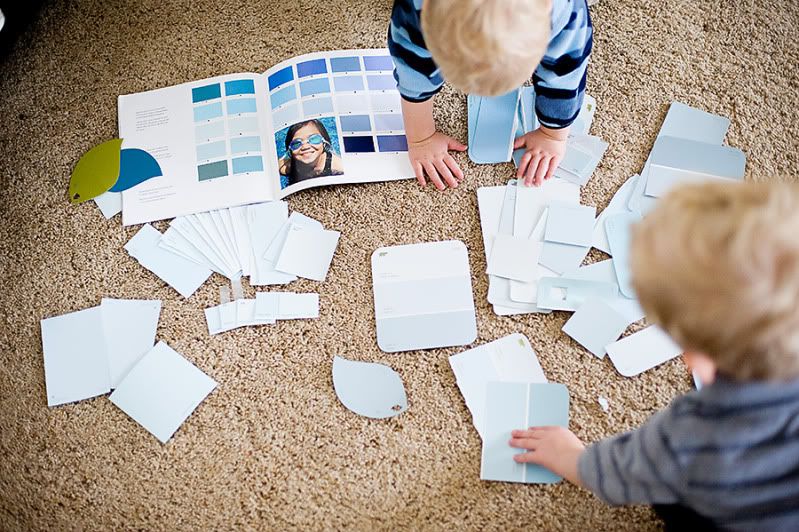
I was going here:


I was thinking the gold-ish color on the walls was fun with the dark brown couches, red love sac, colorful pillows and the blue play area. I think I'll go a different route this time. This was fun, but not what I want this time around.

Anyway, I digress...

We're talking about playhouses today. Under the stairs playhouses.


We're going all out this time. Our contractor is a neighbor who does really great work, and he's really good with "seeing" the big picture in my head. We are on the same page with the house. He's even going to make it pop out a little for dimension and we'll do the finish work on it ourselves with shutters and shingles and everything.

We talked about possibly making it look like a barn...


or just going for it with the house look.

(and please, let's not laugh at my drawings, all right? I know it looks like something my three year old drew, but this is just how I think.)


I'm feeling it with the house.

In searching for inspiration, I didn't find anything exactly like I was looking for, which in a way is good, it will be it's own original thing, but I just had to share some great things I fell in love with during my search...

I came across this AMAZING attic renovation with this little cutie:


images from Tiny Decor Blog

I can't even believe how cute that is! What kid wouldn't love that? It's so realistic! I love the cedar like wood shingle siding, the white trim, the door is amazing. And those cute little window boxes with the flowers and everything. Very cute. It's like a little cottage.


What I ended up liking the best was this post from one of my favorite blogs, hooked on houses. And decided on a simple little house like this:


surely you see the likeness... no?


Although this is an outdoor playhouse, it could easily be made to fit into our space. This is a starting point.

When I showed this to the contractor we started thinking of ways to change it even more.

I noticed this old house on my way to the gym a while ago, and I've always been curious about it, but it popped into my mind when designing the playhouse. This shape would work well. And I like the green siding with white trim... only ours would look, how shall we say, less abandoned?


hmmm... I'm not sure if we have enough space there, but I plan on talking to him about that for sure.

It's going to be great.


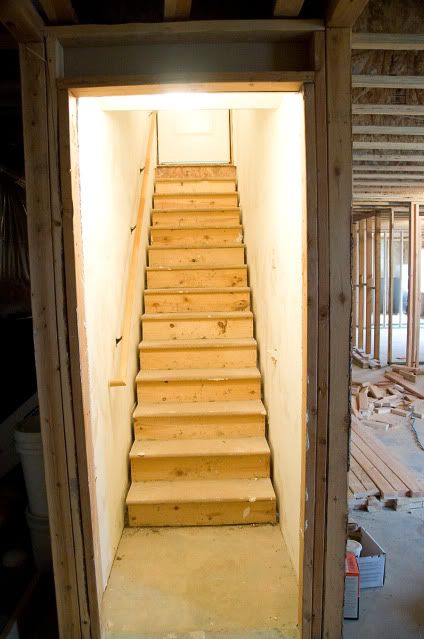
The framing is pretty much done down there. The electricians and plumber are finished for now, but will be back after drywall. The last step before insulation and dry wall is knocking out the wall by the stair way to open it up and make it feel all bright and airy. So we will be taking this wall out and adding balusters and a beam for support instead.

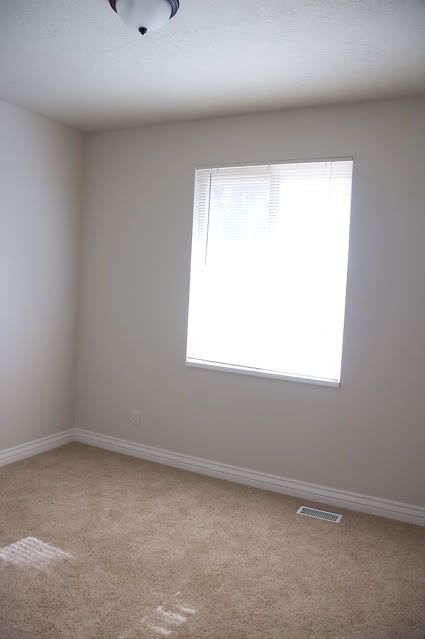
Here's what it looks like right now:


And we are planning on opening up the stairway to have balusters like these:

image:meadowbrook farm

only the post on the end will be load bearing and go all the way up to the ceiling, but we plan on trimming it with molding to make it look like part of the stairs.

The playhouse will be in the large space of wall that's left to the right of the stairs.

I can't wait to see the final result... and I'm a bit nervous. I'm leaving town tonight to run a relay race in Arizona with my sister in-law. Hubby is home with the boys, and I'm sure they'll have lots of fun, it's hard for me to leave my babies! The contractor is coming while I'm gone to finish up, so I'll come home to that wall knocked out and the house framed in. I hope they make it how I want it, and I'm excited to come home to see the result!


As we're going along we are falling in love with our little house.

Wednesday, February 17, 2010

the little guy's room


We're kind of in an in-between phase with this one.
If we had stayed in the same house, he would still have a baby room. He is close to being ready for the toddler bed, but he sleeps so well in his crib that I'm holding off as long as possible. I didn't want to spend too much on his room, because he will be moving in with big brother when baby #3 comes, which IS NOT any time too soon, I'm not expecting, but soon enough that I didn't want to go overboard on his room for now.

There are still a few finishing touches, like window treatments, trim around the window and some canvas prints to hang above his bed, but here's the current state of my baby boy's room re-do.

Here's the before:


And the after:


The tree is vinyl. I found it on etsy. It cost about $40, and the birds where an additional $5 or so, they are from two separate sellers.

I could have painted it, but if we ever wanted to change it later I probably would have had to sand it down and prime over it... I decided this would work better for us.


The loopy chenille rug is from Target and cost only $20. It's so soft and he loves to sit on it and read books, or just roll around on it.


This is his own original artwork. I got blank canvas and some acrylic paints and each of my boys made one on a warm day, outside, last fall right before we moved.


He is our little music lover he got the piano for his first birthday and I found the little ukulele from a local thrift store (deseret industries) for $10. It was a steal. One string is broken. It's fixable. It plays and holds it's tune. It's the perfect color. I love it. I've borrowed it on occasion for photo shoots as a prop. Lots of fun.


I found this bookshelf on local classifieds (KSL Classifieds) for $15! It's solid wood, and pretty old. It has a makeover coming... soon.


I'm planning on making canvas prints of these images for the empty wall above his bed:


And there you have it.

I knew he would be in this room for less than a year and a half probably, but I felt like he needed a colorful place to live and play in the mean time.

Most of the updates where pretty cheap, I kept his same furniture and bedding. He loves it, he gave the tree and birdies "hugs" when he saw them, and he now wakes up talking to his birdies in the morning. You can hear him through the whole house. It's most enjoyable!

I learned something about paint colors:


In the January Better Homes and Gardens there is an article about choosing the right shade for you. It says choose the color your first instinct tells you is the right one, then go a shade or two lighter on the same paint card. I thought that was bunk that some crazy made up. I had a hard time choosing a blue for his room. I wanted it kind of like the blue in his old room, but I didn't save the info and I couldn't even remember what it was... I had it down to three colors. I let my husband pick one of the three. It looked good so we went for it. At the store when they mixed it up and put a dot on the can... I kind of freaked out on the way home, it looked to light. Too white-ish. I told my hubby if it was too light I was re-doing it for sure. I wanted just the right blue, like his old room... when we got home we found an old stir stick while gathering the paint supplies. It was identical to the color from the stir stick from our new paint... and as it went onto the wall I breathed a sigh of relief. It was perfect.When you are surrounded by four walls of color it seems like a lot more color than a dot on a paint can lid, or a little square paint chip.

Turns out it was the same exact color, and it was a shade lighter than the one I first gravitated to, but it was perfect. Maybe they know what "they" are talking about. I'll try it again next time and see if I have the same happy result.


edited to add new pictures of the bookshelf fixer upper and prints above his bed:


Monday, February 15, 2010

the look for less {part dos}

Did you know that the price of furniture is negotiable??

Neither did I. Until last year.

Backing up a bit. We've been married for five years. We have been slowly purchasing our furniture as we've gone along. For our Fourth anniversary we decided we would invest in a bed frame. We knew we wanted a dark wood panel bed. So the search began.

Those of you in Utah will be familiar with the store Down to Earth at Gardner Village.


It's located in a beautiful Red Barn in a historic shopping center. They sell the most awesome furniture, I love the store so much. It's one of my favorite stores to browse. It's one of those places I could probably find things for every room that are my taste and style.They do custom upholstery and sofas as well. We found a set there that I loved, but it was pricey. We waited until the bed went on sale and purchased just the bed and decided to save up for the rest.

I'm glad we didn't buy it all at once, and here is why:

I learned who the supplier was, and I did some homework. I found a few other retailers in the area, they didn't have it in stock, but where able to order it.

When it came time to buy the dresser and night stand last fall, I checked the price at my favorite store, then I got onto the website of the manufacturer (home elegance) and called around to every other store in my area. I was surprised at how the prices varied. The store with the cheapest price came in about $250 lower on the dresser and about $70 lower on the night stand. For the same pieces of furniture!!!That's a big difference. The only problem was that they had to order it and I would have had to wait for about 6 weeks. No big deal...

But I made one more call. The closest store to my new home. I talked directly to the manager and asked if he would match the price of his competitor.I let him know I was willing to buy it that day and that I was ready to pay cash if he would do it. He took my phone number and crunched the numbers, called me back in a matter of minutes and said "sure. When do you want it delivered?" End of story. I saved over $300 on the whole set.

It pays to do some homework, and to be patient. I hated the mis-matched look that I put up with for about a year, but it worked to our advantage. And especially in economic times like these, if you can pay cash for what you are buying some retailers are willing to come down on the price a little. The sale holds no risk for them, they are guaranteed to get their money.

And now for your viewing pleasure, I present to you....
The Master Bedroom...

In all of it's un-decorated glory. And because we're all friends here, and because this blog is about decorating for "the rest of us" I totally don't mind showing it to you in this state.

Consider this a "before" picture.


This room is like an empty canvas, waiting to be injected with personality.

We've been in this house for a little over three months and so far all I've done is change the green pillow out for accent pillows of various other colors to test the waters.

I've held off mostly due to color commitment issues, but I now have a plan in place and will probably get it going after my oldest boy's bedroom is done.

In the mean time I don't hate that it's pure and untouched, and I find something a little soothing about the quietness of it. The white bedding will stay, but I'm planning for a lot more texture and some little pops of surprise color (without loosing the serenity of it all.)

Oh, and here's the link to the manufacturer's site and the exact model number of my set.

I think I'll never pay full price for a piece of furniture again, now that I know you don't really have to. There are deals out there for those who dare to ask.

Good luck and happy wheelin' and dealin'!

Friday, February 12, 2010

I won something!!

Okay, so today was supposed to be part two of "the look for less" and we'll get to that soon enough, but....

I WON SOMETHING!


And I never win, so I'm so excited!!

I entered a give away for a FLOR rug, you know, the kind that come in square carpet tiles and you make it fit where you want it to go...

from one of my favorite home blogs Just a Girl

Go check it out! And celebrate with me!!

Wednesday, February 10, 2010

the look for less {Part One}


I'm a Pottery Barn Junkie. It's true. If I had endless fundage and no sense for bargains I could probably furnish most of my house with Pottery Barn merchandise and be completely satisfied with it. I can't say that for most stores.

I couldn't do it at RC Willey for example. If somebody said go choose whatever you want and decorate your whole house, I don't think I would like enough stuff to really do it.

It's just not my style.

Pottery Barn, Ballard Designs, Crate and Barrel, Bassett, my favorite local store Down to Earth... That's my style. It comes with a steep price tag. And I'm not willing to spend that much. (and as a post edit Down East Home as I'm reminded by reader Kim... can't believe I forgot to mention it! And those prices I can handle! Mostly.)

I've learned how to get the style that I want for a price I'm willing to pay. Here's a recent example.

We needed an armoire for our family room. Our needs where pretty specific. I needed to get the TV and blu ray player up and away from little hands, I needed one with doors to tuck back or fold in so no one bonked their head, or pulled on the open doors, etc. I wanted it to have farm house character and style, I wanted it painted, not wood tone. We needed drawers for media storage. I wanted blue or white.

I wanted this one:

Pottery Barn price tag? $1,199.00. gulp.


So I improvised. I conceded that I wasn't going to find that exact thing. And that I was willing to paint and distress my own piece if I could find the right shape. I set a goal price of about $300.

I found some that where a good shape, but the doors didn't tuck in.

I found one that was so cute. A mix of country and farmhouse, but it was too big. I almost bought it anyway. It was $200 more than my goal price and would have been a splurge. Well worth every penny, but a splurge. I decided to hold out for "the one."

I found one we loved. But it was $675 and they wouldn't come down on the price, so I walked away from it.

Two months of armoire shopping and finally I found this one:

I like the round feet on this one even better than the PB version.

I bought it intending to paint it right away, but for now I don't hate the fact that it's black and I might just let it be for a while until we move our brown leather couches downstairs (when we finish the basement) and I choose a new couch for the family room.

The price tag says $810. But I didn't spend close to that.

It was a floor model at a decor store that caters to interior designers. They have a lot of fabric swatches for custom upholstery and this was holding all of the swatches. It had never been used in any other way, was still basically new, and I found out that it came from a distrubutor that maufactures PB items. No wonder I liked it so much!

It's a quality piece. The back isn't that flimsy particle board stuff either. The inside has these gorgeous wood slats, very rustic. And the drawers are on smooth rollers, the kind of suck in by themselves when they get close to closing.

My price? $300!

It pays to be patient and keep searching for the right piece at the right price. You just have to know where to look. The store posted an ad on KSL classifieds, otherwise I would never have gone there.

Tips for finding furniture that is refinish worthy:
Look for solid wood, no veneers. Look at overall condition and stability of the piece. Look at craftsmanship. Does it have special details or something that makes it unique? The last thing is price. Is it worth the price plus the work and cost of the paint? In this case, YES!

Now I just need to decide if I want to go robins egg blue...

or classic distressed white.

Coming up: Part Two. How I got a killer deal on master bedroom furniture.

update: see my finished product here:

Sunday, February 7, 2010

come on in...

New front door before and after


Outside:


Inside:

I didn't get rid of the rug, just moved it to the living room while construction is going on in the basement... it was seeing a little too much traffic and a little too much dust. It looks so good in the living room that I just might leave it there though, thus meriting another rug purchase? For now the simple green one is doing it for me though.


The process was like this: Scott and his dad picked the door up last week, an installer came and cut the old door out, some stucco and some mortar had to be removed. It took him 5 or 6 hours to install it. I'm so glad we didn't attempt to do it ourselves. Then we finished it on our own. We applied a wood conditioner, then stain, it was something with "chestnut" in the name, made by minwax. Wipe off excess stain. Let dry for 8 hours. apply first coat of polyurethane. Let dry for a whole day, sand and apply second coat. Let dry for another day. Sand and apply third coat. Let dry. Remove protective plastic off glass (it was all I could do to wait for that part and I started removing it when the door was still wet. I'm impatient!) Stand back and marvel.

It was a lot of work, but so very worth it. We've already had lots of nice comments from neighbors, so I guess we did the right thing. :)

When I first saw this house on the MLS, the first thing I thought was... those shutters need to be a different color than the stucco, and that door has to go! We painted the shutters black, just because we already had the paint, but I felt like it wasn't quite what I was going for. When we decided to stain the door, instead of painting it (painting it seemed like a crime, even though I really wanted a red door.) we also decided to make some stained wood shutters that will match the door. It's going to be a spring project, but for now it looks lots better.

We've been in full project mode around here, and I love it.

I love the difference that small and large scale changes can make to a home.

This house was crying out for a new door. (Whoever chose that door for this house was kind of off. It just didn't fit the house.)

What I love is that we are slowly bringing in the influences that make this OUR home.

A little bit cottage, a little bit farm house, a little bit country, a little bit craftsman, a little bit french country... But very cozy and homey.

A lot less suburban rambler.

'Cuz we don't live in the suburbs anymore. (And love it!)

one more time... just because I can't get enough...

roll that beautiful bean footage!


ahhhhh....
much better.

And I already have phase two planned:

Carriage lantern style. I think something like this will work really well for the porch light. And on the sides of the garage. And the patio. It never ends. One improvement inevitably leads us right into another.

But for now I'm just thrilled with my door.

I'm in home beautifying heaven!

Like it?