Tuesday, March 29, 2011

It's here! And a pillow poll...

It's here! Scott brought the sectional home on Monday night, I was so thankful they shrink wrapped it for us, it was a wet, rainy-snowy day here. It all arrived in great condition and it stayed clean. Here's a close up detail shot of the color and texture. I really do love it. I can't wait to get it in! I'm tempted to put it in our upstairs family room and kick the leather set out to the garage, just so my new baby can be inside... but I'm withstanding the temptation, because I know it's motivation for us to get the odds and ends done.

I talked in my last post about how I can't wait to put some fun pillows on it. I sat down for a minute last night and tried to pull some ideas together. Here are some hypothetical possibilities- the Hubbs and I already know which one we love the best, when I showed him the choices he agreed fully with the one I wanted... without knowing which one I had already chosen as my favorite, I love it when that happens!

We thought it would be fun anyway, to get your input! Check out the poll on the side and let us know which one you like the best... not that it'll make any difference... but just for fun! I can tell you there's one choice I pretty much don't like at all, but threw it in anyway to have a nice three choice poll. :)


Of course they all involve a bit of blue. I don't know what I'm going to do if I ever decide I don't like blue anymore, it's kind of "my color".

We found an ottoman really similar to this one that we both really like, and of course it will all look different when it's actually in the room and everything, but I'm getting so excited I can hardly stand it! This is the second basement we've finished in less than two years, to say we're burned out from being in basement mode would be an understatement, but we're finally in the home stretch now! Yay!!!

*disclaimer- some of those pillows are not "really" pillows... I just made some designs in photoshop using fabrics I liked and most of them I would be making myself... others I found randomly from stores I like online.

Sunday, March 27, 2011

carpet and couches... getting closer!!!

CARPET!!!!

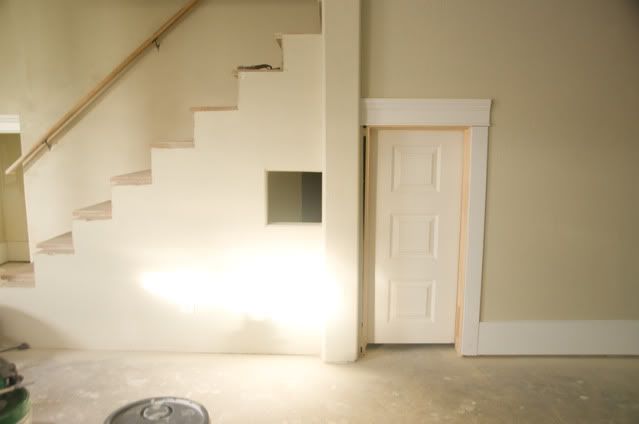
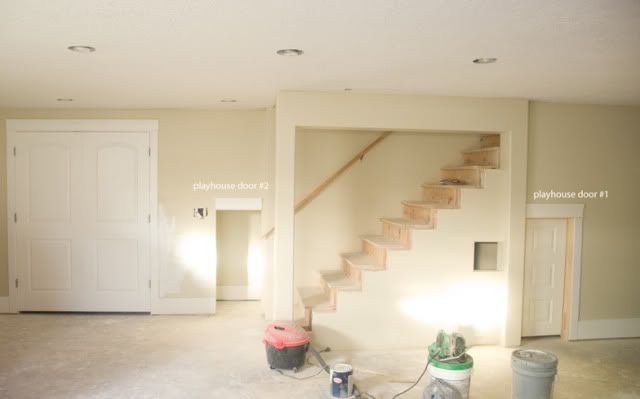
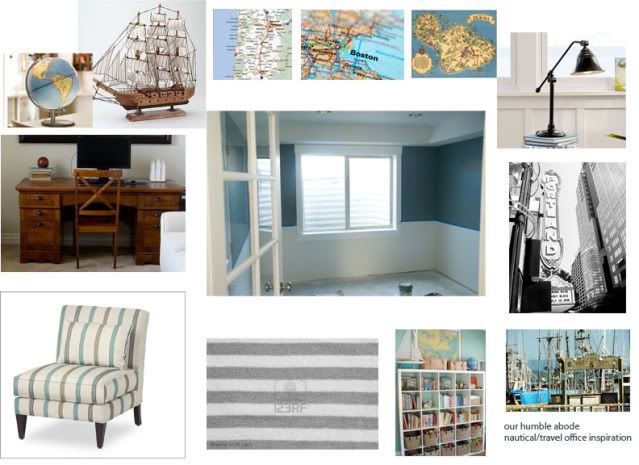
I thought we would never get to the carpet phase in the basement, but I'm so happy to report, we picked some out on Friday! It's super soft, and I can't wait to finally be able to settle in down there and use the other half of our house! It's actually not any of these colors, so you'll just have to be surprised, but it is neutral, it's going to look great with the paint, and it's a good mix between "light" but not "too light to keep clean". We're going for light, bright and airy so I did go with a lighter carpet. The only things left to do before the carpet comes are install the bamboo flooring in the office and our neighbor contractor friend is doing our stair treads and stair stuff (banisters, ballisters and the like). We've been waiting for some materials to be made, but it looks like this week is the week, so hopefully carpet NEXT WEEK!!! Ahhhh!! Yay! My almost three year old chattered on and on yesterday about all of the toys he was going to take downstairs to play with when we get our carpet in. We're all just a little excited!

In the spirit of "almost" being finished with the construction, my mind is turning to the fun and pretty parts, decorating and furnishing. We had originally planned on moving our dark brown leather set down, but to be honest, I just don't love them. They were a mistake from the minute they were delivered to our first house. They're just a lot darker than I prefer... after talking to my (wonderful, supportive, patient...) hubby, we came to the conclusion that now would be a good time to invest in a sectional like we had wanted for downstairs and eventually we'll probably sell the leather set and go with something lighter and slip covered for our upstairs great room.

So, what do ya do when you're two weeks away from carpet? You start shopping for a couch! I should have just waited, it would have been easier and smarter that way, but I was too excited. I did some online shopping (homework.) and was a little discouraged at how much it would cost to get the one I would really love. I priced out Pottery Barn (for fun) and the total was about $3,400. OUCH. We've been saving up, we're also using some of our tax refund, but sheesh. That's almost as much as my first car cost. I priced out everything from Bassett, RC Willey, Ashley, Sofa Mart and Ikea. What I came up with was nada. The ones I really liked were crazy expensive, the ones in our desired price range where ugly (aka puffy arm sectionals that belong in the 90's). The Ikea option was definately more affordable, but they always seem a bit lighter and not as well constructed... I'm saying that because we do have the ektorp slip covered chair, I like it, but it's not the most comfortable seat in the house. It's okay, but it feels kind of hard, when guests sit in it they always make a comment like "Oh, I get the comfy chair!" then they sit in it and I always see this surprised look on their faces, it's really not as comfy as it looks.

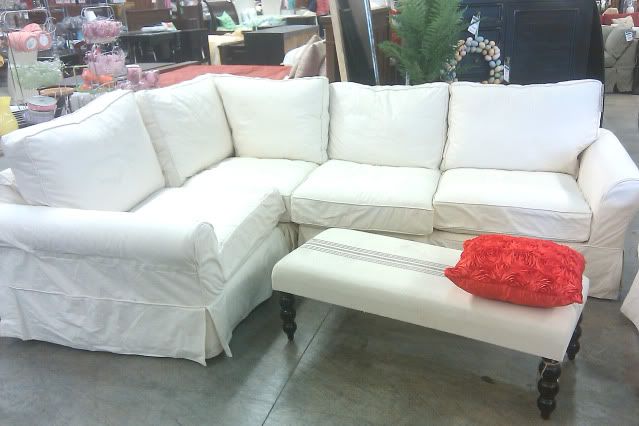
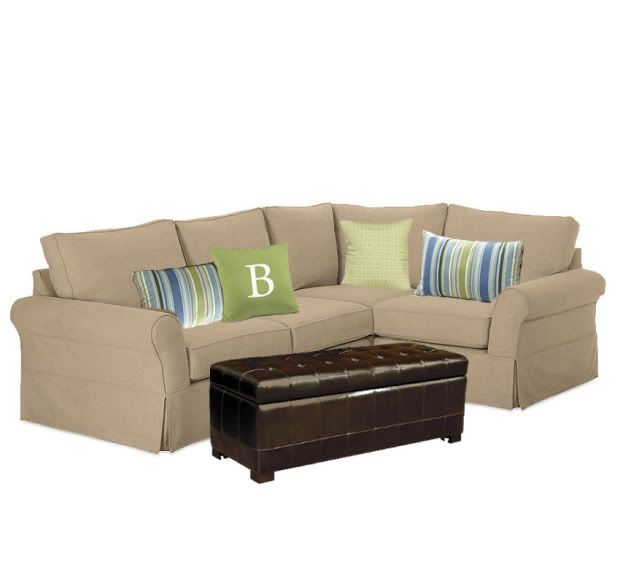
Anyway, on a whim one day last week, I loaded my little boys up and headed to Down East Home. They have a lot of discounted Pottery Barn and other brand furniture, but you sometimes just have to get lucky. Right as I walked in, I saw this beauty, staring back at me:

Um... yes, please! Light, bright and airy! I was thinking something along the lines of cream, gray or a light tan would be perfect and there it was. The fellas and I sat on it and it was super comfy. Nice down cushions and of course slip covered and highly washable. The price tag had it marked down to $1399.00, yes, that's a lot of pennies, but if I had walked into pottery barn and ordered the same sectional it would have been close to $3000. And this is a piece of furniture we plan on keeping for a very long time AND we have saved up cash for this purchase... just sayin'... I'm not a furniture snob.

So I took this picture with my cell phone and practically skipped out of the store!

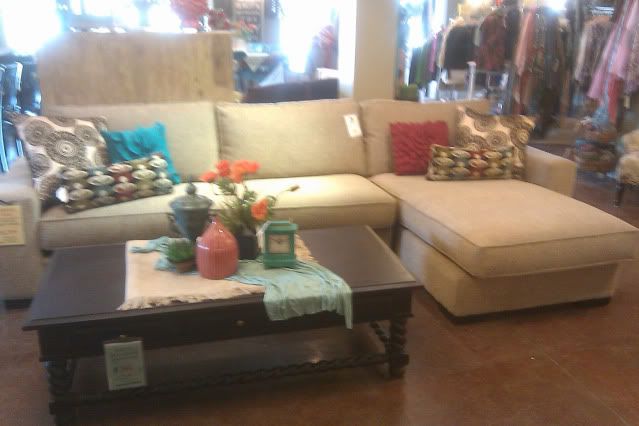
Scott liked it too, when I showed him the picture, so we made another trip in on Saturday to look at it. Right next to it, was sitting another, even better looking sectional that had just come in the day before:
I didn't get a picture of the "actual" one, because my kids were bouncing on couches and we were comparing every detail of the two sectionals. Something about this tan one just seemed "nicer" it seemed like the slip cover was less "slumpy" it just seemed to be a nice tight fit, the cushions seemed to have a little more support and everything about it looked too good to be true. Sometimes some of the furniture that comes in there looks a little like a floor model, it might have marks on the the upholstery, dings or small scratches in the wood, stuff like that, but this couch was pristine. It was an easy choice looking at them side by side. The tan-ish one just seemed better. The fabric was a B class linen/cotton blend fabric, where the other was an A class pure cotton. It was $100 more, but obviously well worth that $100 extra.

We left and I hit up one more store, just to be sure it was what we wanted. I went to my favorite, Down to Earth.
There I found an upholstery sale- 30% off upholstery items. This couch was marked down to $1399, so in the same range as the other two. The cons about this one though, it wasn't slipcovered, and it's actually just a huge sofa with chaise, not a true sectional. This thing was gargantuan though. The lady working there measured it for me, it's 138 inches wide... um, holy sectional, Batman! I'm sure it would have "fit" but it would have felt like too much furniture, for sure. It was comfy though, and that chaise can be moved to the other side, so unlike a lot of sectionals the configuration is flexible. I also priced out a sectional like the one at Down East, made by ROWE, and was sickened by the $3,000-$5,200 price tag. Yikes!

As we talked about it later that day we felt like that second tan-ish colored one was the perfect one. I went back to the store to have them put a hold on it until we can pick it up on Monday. They could only hold until end of day Saturday, and I was a little worried it wouldn't last, there was another couple there looking at it at the same time that almost put a hold on it themselves, but left to check out another store first. It would sit there for sale all day Monday before we would be able to pick it up. So we decided to just pay for it, have it wrapped up and taken off the floor and pick it up on Monday. I did ask the manager if she would take $100 off to make it the same price as the cream one, but unfortunately, since it was brand new to the store and it was a class higher fabric, she had no wiggle room. Darn, but it's never bad to give it a try.

I almost backed out as I was standing there in line. It kind of makes me sick to spend large sums of money. Buying something expensive feels like a defeat for my DIY, make it work attitude. I almost threw up in the car on the way home, no joke, it made me so ill. My hubby thought that was great, he loved hearing that I didn't like doing it! But he was sweet and tried to make me feel better by reminding me we would keep it forever and it was the best one we had found yet... etc...etc. What a good guy. :)

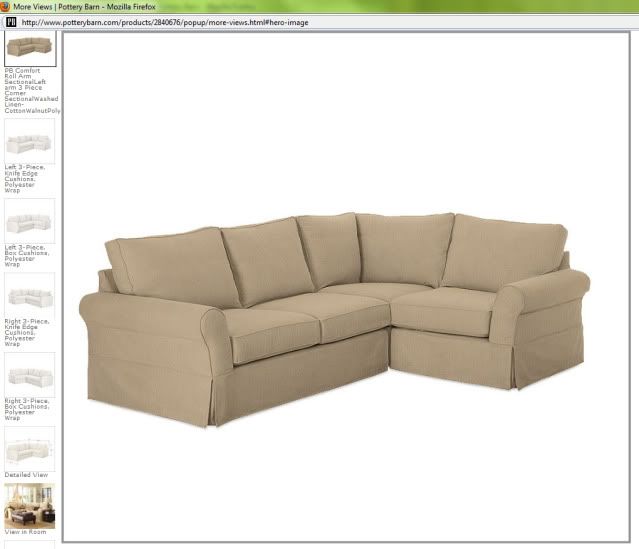
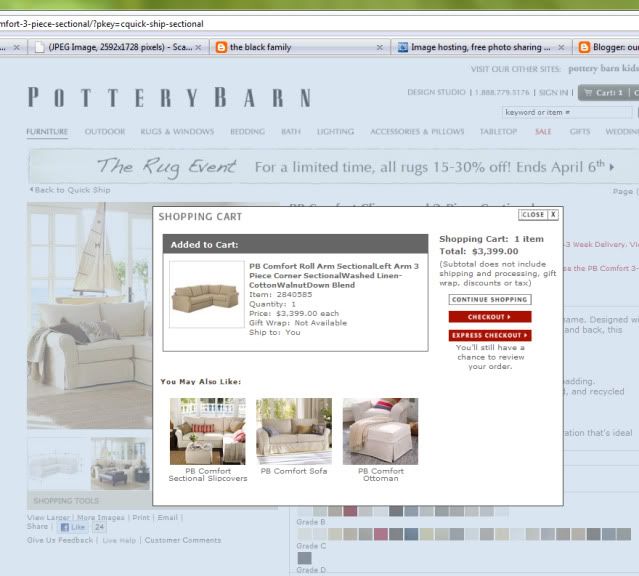
As soon as I got home, I put one in a hypothetical cart at potterybarn.com.
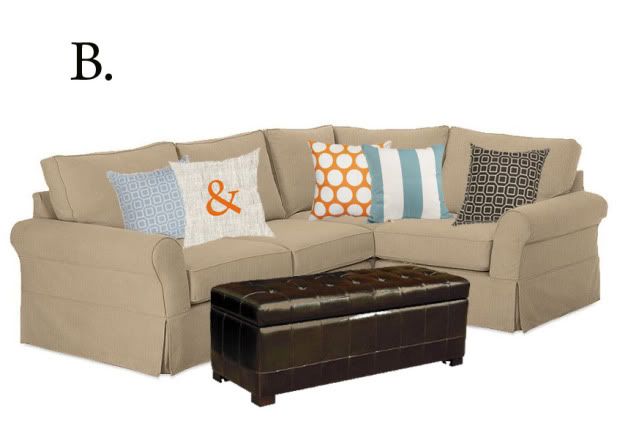
3 piece sectional, box cushions, down blend cushion, washed linen/cotton B fabric, walnut.


And then I felt better.
$3,399.00. Mine was $1499.o0 for the exact same sectional. We DO plan on taking great care of it and keeping it forever. I can't wait to snuggle up and have a family movie night on it, mostly I can't wait to just get it into my finished basement! I can't stop thinking about what colors of pillows I'll put on it.

I have to say this: I'm not one of those snobby expensive furniture people I hate spending money. I like getting deals. Most of what I have I found for crazy cheap, I have no problem with buying used things and fixing them up- I do it all the time. I was perfectly willing to buy something used and put my new favorite slip cover sewing lady to work. But we just decided it really was better for us to just invest in one that we would love and use for a really long time. We saved up our money and paid cash for it, I feel good about that, and I do love it... why do I feel the need to disclaim and justify this furniture purchase? Enough. :)

I told my hubby last night "I hate spending that much money."
and he reminded me "I love that we just saved some money."

I know he was just saying it to make me feel better.

So that's how I'm choosing to think about it. I saved us some pennies.... right?

We pick her up tomorrow and she sits in the garage all wrapped up in plastic until the carpet is installed, and then you better believe I can't wait to unwrap her and put her in her new home!

If anyone in the salt lake area is looking for a cream pottery barn sectional, the Draper Down East still has that first one, and it's a pretty comfy one too!
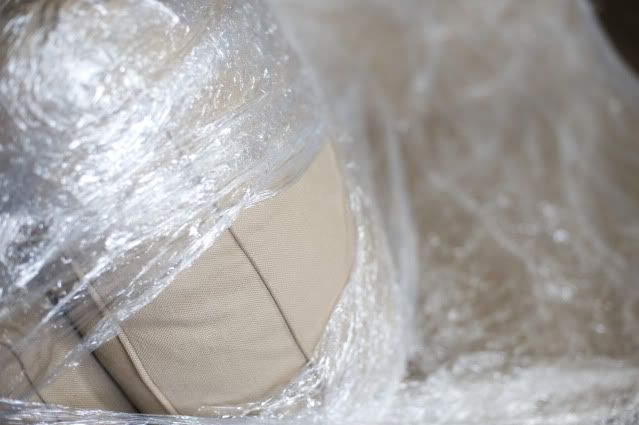
Monday, March 21, 2011

monogram pillow

I never met a monogram I didn't like. I might possibly be obsessed, we have the letter B all over the house, but it's fun and it makes me happy, and my preschool age boys love it too! They like to trace this pillow over and over with their little pointer fingers. :)

Here's the quick how-to for those who would like to try working with an applique!

#1. What you need....

Print out a letter in a font you like and a size you like (I put mine on cardstock).

Felt- any color. Mine is black and the fabric I chose was a natural colored textured fabric. Burlap is cute, but not very cuddly.

Fusible webbing- wonder under or other.

A pencil, some fabric scissors, and an iron.

#2.
Cut out the letter, trace it backwards and upside down onto the fusible webbing. Make sure it's wrong side down, picture it like this, you want the sticky side to be the side that touches the felt, the backing peels off.

#3

Set the paper template aside. Now I'm working with the "B" that was traced from the fusible webbing, NOT the cardstock letter. Do a rough cut, a rectangle or whatever, around the letter you traced onto the webbing. Now it's ready to iron. You don't have to peel anything off for this part, when it gets hot, the adhesive in the webbing will stick to the felt.

#4.
Iron the webbing. Follow the directions on the package, make sure to hold the iron on the webbing for the recommended amount of time.

#5
The next step is to cut around the traced letter. The felt is now adhered to the letter. So felt on one side, the backing of the webbing where you traced is on the other side.
It will look like this when you peel it off. Peel the backing when you're sure that you've cut your letter out as close to perfect as you can get it.

#6
Position the felt letter on the fabric. (It might help to use some spray adhesive to stick it temporarily until it gets ironed on, you will be ironing from the back side of the fabric and it might be hard to tell if the letter has shifted or if it's still centered where you want it).

#7.
Iron from the back side of the fabric. Make sure to leave the hot iron on the area for as long or longer than the directions say. Mine took forever.

#8
Done! You might want to make sure that your applique is adhered everywhere, if not you can re-iron and stick it down good. That's the top part, from there it's just a matter of sewing the pillow cover. I chose to do envelope enclosure back so it can be removed for washing. I change my pillows out so often that it's just not sensible to sew the pillow form all the way into the pillow for me. It's nice to be able to easily change or wash them without loosing the whole pillow or taking it apart.

Enjoy! I have one more of these in brighter colors planned for my other couch, and a few more accent pillows ready to sew as soon as I get the time and energy to get it done! Spring always makes me feel like changing out my pillows.

Happy Monogramming!

Wednesday, March 9, 2011

colorful house

I've been meaning to share this for those who may have missed it, but this great house was featured in the February Better Homes and Gardens issue. The moment I saw it I was in LOVE with the fun and colorful spaces.


This stair case is one of my all time favs! I love the built-in shelving and how that hall just looks so perfect right there leading into the family room.

Little pops of Aqua and orange all over, even on the outside of the house. I love that it's mostly white, the white makes it classic and the bright colors hint at what's inside. And how fun is that front door??


Of course I always love me a fresh white kitchen. Commercial grade gas ranges always come in handy too. :) My dream house has one of those for sure. I love the color on the island in this otherwise crisp white space. It's perfection!
I ripped this whole story out and put the whole thing in my inspiration file. There are a few more rooms featured, but these were my favorites. I hope you all enjoyed it as much as I did!

So (in my opinion) why this works so well... the oodles of white trim tie every room together, the huge windows let in lots of natural light, the color palette repeats throughout the house, some rooms add in a few more colors, but they all have at least one or more of the colors in the main palette. It fits the family who lives there, and she created a space with meaningful things. Very well done. I'm taking mental notes. We can all do this in our own way with things and colors that inspire us!

Thursday, March 3, 2011

CSN stores giveaway winner!

The winner is Kelmarie!
Lucky #1! And here's the screenshot from random.org to prove it!

I'll email you with the details so you can claim your prize!

Wednesday, March 2, 2011

basement progress update!

*Don't forget to scroll down and enter the CSN Stores giveaway, it ends on Thursday morning!*

We had a really productive, basement lovin' weekend! I'm just now getting around to sharing all of the stuff going on, but the good news is, most of the trims are cut, nailed and caulked. We have a ton of painting to do, but we can handle that! We still need to go carpet shopping, and our stair treads and banister parts have been ordered and work on that should start in the next few weeks (we hired that part out).


The playhouse now has a cute little door, we're re-working the plan for the play house a little, I'm not sure exactly how it's going to look when it's finished, but I think it will be fun. Notice the little doorway on the left, that doorway leads into a little hallway like a "tunnel" that connects into the main area of the playhouse, the kids already love running around in circles, in one door and out the other. We put little lights inside the tunnel area and everything (It's hardly a tunnel though, an adult can stand up straight and walk through it, but the boys think it's magical and that's all that matters!)

Scott has been hard at work adding craftsman details, and everything is going to be light and bright. This little built in was a last minute whim, it was supposed to be a closet with a door, but it's on the same wall that our TV will be on. We decided to turn it into a built in shelf and I'm so happy that we did! Scott built a base and trimmed it out, next come the inside shelves. I'm deciding if I want the back painted white like the rest of it, or if I want to do something fun with color on the back... it could be really great. Thoughts?


The biggest change down there has been the office. We took the covering off the glass door (details on that in another post) and taped off the area where the wainscot will be (I promise we measured, and it is on a third, although in this picture it kind of looks like half, I promise it's not) and selected a paint color and painted the top part of the wall.

Are you ready for this?


Waaaahhhh!!! It's way out of my comfort zone, I usually go for light bright neutrals, but I'm really liking how it's looking! The color is Martha Stewart School House Slate. We mixed it in Olympic low VOC eggshell finish. I freaked out when Scott put the first swipe on the wall, remember my painters remorse problem? In our first house I learned quickly that I really don't go for darks or even midtones. I like light paint. This kind of made me twitchy as I watched it go onto the wall. I don't know why the turquoise in Carter's room didn't bother me, it's a bright color, so I wasn't as nervous, but this is super dark for me. Lucky for all involved, I have zero painters remorse this time, I really love the color!

We spent Friday night down there, Scott painted while I peeled that horrible protective stuff off the glass doors. At one point, he tapped me on the shoulder and pointed to the wall behind me. I looked up to find this:
What a guy. :) We always feel a little nerdy when we admit to people that working on a project is as good as a date night for us, but it really is. We both really enjoy building things and making our house better for our family, and we have a fun time talking and laughing about silly stuff while we do it.

The plan is this: We are laying dark bamboo on the floor, we'll keep the same desk we have upstairs and I plan on bringing in some grays, lots of whites and who knows what else to accent it with, but here's a little idea board I threw together to kind of show where we plan on going with this:


A tiny bit nautical, but not overwhelming nautical. We want to display some pictures and maps from our favorite trips and vacations on the walls.

Here's the big question though. We are thinking we should paint the ceiling a muted down version of the wall color, a kind of grayish blue, just so it's not such a harsh transition between the dark slatey blue walls and the pure white ceiling, but at the same time, I kind of like the clean white ceiling and Scott is talking about doing some fancy trim work like this:


Which would be de-lish. If we did that, we would probably do a light gray toned paint inside the boxes to make the trim work pop. That's something we can add later though. Right now we just need to get to the carpet phase before I go mad.

The last and smallest detail is that we took out an ugly wall mounted globe light in the stairwell and replaced it with this beauty:
I'm dying over it. For the first few days I would open the door and just gaze at it (the door will come off as soon as the stair work starts for an open and airy transition to the stairs). We still have to touch up paint around it, but I couldn't bear to leave it out of the basement update.

Anyway, that's what we've got going on down there! When we first saw this house we were over-the-top excited with the potential we saw in the basement, it's a daylight basement, and it really is nice and bright down there, the big windows make it feel less like a basement and more like just another part of the house. We can't wait to get 'er done and start enjoying it!