Friday, August 27, 2010

winner!

happy weekend!

Sorry to drag this out until the end of the day, but things are crazy 'round here right now!

The winner of the Hippie Bus print giveaway is....

Jill!

Congrats! I hope that cute little fella in the the workin' man goggles likes it! (we have those same play goggles and it cracks me up everytime my kids put them on!)

contact me by email: mindy@mindyblackphotography.com and we'll talk over the details of the framing and where you want this baby shipped.

Thanks so much to all who stopped by to say "Hi!" I so much loved reading all of your kind words and I feel like I've got some new friends out there in the bloggy world! Thanks so much!
I've been surprised to find there are more of you out there than I ever thought! It's fun, but I'm just a little skeered now. :)

I have a few things from this week I'm excited to show you, but it's going to have to wait until next week. This week has been pretty crazy and I've felt like even staying up late into the night to get all of my work done I'm waking up every day behind. I'm hoping to catch up a little this weekend and find some time for the projects that I really want to finish, and also have some time to relax with the ones I love.

I hope you all have a great weekend!

Monday, August 23, 2010

board and batten goods and paint

*Reminder- Scroll down for my giveaway ending this friday!*


I've had lots of questions and emails about the paint colors used in my big boys room and on my armoire. The paint on the armoire is a custom mix, meaning I just mixed a bunch of paint I had until it turned out how I wanted it. I wanted a greenish blue but not too bright, so I added some black and grey to give it a bit of a "dirty" or greyish cast to it.

I took my paint stick to the good ol' Home Depot and had the nice guy give me a formula for the color.
I'm sorry I can't decipher it for you, those of you wanting to should probably just print this off and take it in maybe? Good luck!

And the paint we used in my Big Boy's Room is Valspar Signature Grass Lake. yummy. I love it.
I think it would look cute in a girls room too. Imagine it with hot pinks and oranges and yellows!


I promised I would give a quick little "how to", this is more of a "how I did it" though.


(don't judge the outlet covers. I think I'll end up spray painting them so they blend in, all of the light covers and outlet covers in our house are the same color as the paint when we moved in... builder beige, everywhere!!! Anyway, I'm getting to them!)

I'm afraid this is going to be a boring post. Please pretend to be very enlightened and interested. :)

One thing we really wanted to avoid was redo-ing the moldings already in place, so we knew that unless we wanted overlapping, the vertical pieces need to be super thin, like 1/4 inch thin. That left us very limited with what materials would actually work. We found some at Lowes or Home Depot and did the calculations and it was going to cost about $200 for all of the pieces, that included the top rail. We contacted a local mill just to do some shopping around and got an email quote for about $160. Then, a few weeks later I saw a post Chris wrote about using sheet mdf instead of pre-cut. To our surprise, doing it this way only cost about $45 in materials!! But because we used 1/4 inch thick sheets, the Home Depot couldn't cut it for us, they said the rollers on the saw mess it up or something, so we had to rip our own sheets, which was tricky considering how thin they were, but it worked out fine in the end.

Here's the run down:

-The vertical strips are 3 inches wide.

-They are spaced every 13 inches (random number, I know, but that's what worked so we didn't run into outlets and it turned out pretty even.

-The spot under the window has a special 11 inches between the styles. It wouldn't really work out and look right any other way.

- The top rail is 4 inches wide. Our bottom moldings (already there) are 5 1/4 or 5 1/2.

-We used those same 4 inchers to trim the window.

I just went along and measured every 13 inches, then three inches to accommodate for the width of the strip, then another 13 inches, all the way around. Once it was marked I went to town with the nail gun. (I used to be so scared of that thing, but now I really like using it!) My hubby set up the tools for me, watched the kids, and brought me more pieces when I was ready for them. He's the best. He's there when I want help, but he backs off when I have a mission to complete. :)


So I placed the vertical pieces first, then the top rail. Of course I needed help holding the top pieces in place while I nailed. My hubby did the window, miter cuts still make me nervous, and he has become quite proficient with all of the molding he's cut for me over the years (because I'm a molding freak!)

When it was all nailed in place we just caulked it really well and painted. I used Behr paint plus primer (since the mdf was unprimed and unpainted) and it really made the painting go faster. By bedtime the next night it was all dry and his stuff was all put away. It probably took a total of 1 hour for the board and batten and maybe 2 hours of painting.

3 hours and $45, and I know it's not text book board and batten, but we are thrilled with it!


Friday, August 20, 2010

thank you's and a giveaway!

First of all, thank you all so much for your kind and encouraging comments on my big boy's room!
I'm overwhelmed and a little giddy that you liked it as much as I do!


I don't know when it happened, but we passed the 100 (official) followers mark without realizing it! (and an unknown amount of others!)

This is a little funny to me, because I never set out to be a home blogger, and I never really thought anyone outside of my friends and family would care about our home updates and the ideas floating around in my head. :)

So I want to do a little thank you gift giveaway to celebrate!

I'll be giving the winner their own "hippie bus" print!

This would be a fun colorful addition to a play room, a kids room, a family room or wherever you want to hang it!

I'll also throw in a FRAME, the color of your choice and I'll ship it to you if you're not local.

I personalized the license plate with my Carter's name on it, but I'll do the same for you if you want a last name, a child's name, personalized numbers, whatever.

Just leave a little hey-howdy-hey in the comments to enter. Giveaway ends next friday. Good luck!

And onto the Thank-You's!


I need to thank some lovely ladies for featuring my blog, my home and some of my posts! Thanks so much for the love! I've met some wonderful ladies coming from these features, and it's been so fun to get to know new people!


At first I was really embarrassed when I would see my own things on someone elses blog, I felt kind of inadequite. Because I don't claim to know what I'm doing. I don't point out the features to say "oh wow, everybody look at how cool I am!" I just really feel the need to say thanks to these people who have helped me come out of my shell a bit and made blogging a great experience!

Chris from Just a Girl
(one of my very favorite home bloggers) has been so kind to me.

It's sometimes scary, pushing the old comfort zone and putting it all out there for strangers to see and read, but she has been awesome! I wish she lived closer, because I would love to meet her in person! And I love her entire house!

She featured my master bedroom progress here and my exterior before and after a few months ago, I can't find that right now, but I'll link it when I can. :)

Aimee from Sprik Space featured my kids canvas art in her brief bits
Brief Bit Feature Button

Kristin from My Uncommon Slice of Suburbia featured my blog on her feature friday post a few weeks ago!
Photobucket"/>

She has some before and after's of her own that are A-MAZ-ING! Epsecially her kitchen redo!

Also a big thanks to Jen at Tater Tots and Jello for the shout out on the big boy's room!


And I'm up on House of Turquoise today for Carter's room and my painted armoire!

Thank you, to all of you who read, to those of you who stop by to say hey and to you ladies who have featured my projects! It means a lot to me, and it's been so fun to get to know you!

Wednesday, August 18, 2010

[painted armoire] before & after


Yes, I finally did it!


I did some light distressing on it, I used 120 grit sandpaper and just did it by hand. I tried to rub the places I thought would have been worn over time if it were an old piece. The edges, the corners, the little parts that rub together when the doors open and close. The distressed parts may have turned out to be my favorite of the whole thing.


I love how the bottom coat of black paint peeks through in some places. I took some walnut stain and did a tiny bit of glazing in some of the corners and distressed places. I used a wet rag and the tiniest amount of stain and rubbed it in key places to make it look a little bit older, rather than a freshly painted piece.

I rounded up some more colorful accent pieces and pulled out some of the reds in my pillows.


It makes the family room look way more fun.

I didn't hate the black, infact, I liked it, but with our dark brown couches I just felt like all of the dark stuff was sucking the light out of the room, and sucking the life out of me!


What I love about a piece like this is that it's perfect for family life. I'm not going to stress out about my boys driving their cars on it, or opening and closing the doors over and over, because it's supposed to look "lived in". When the day comes that I decide to change up my colors and phase out my blues, greens, aquas and turquoise, I can paint it another color, or white, and it will look great with layers of paint showing through in the distressed places.

I'm pretty happy with the way it turned out! There's nothing a new coat of paint can't fix!

And here's the disclaimer. I did, in fact, make my own custom paint color. I chose a color I thought was perfect (Behr Marina Isle) and I put the first brush sroke on and could tell immediately it was way too light. It almost looked baby blue next to the black. WRONG color! I panicked for about 3.5 seconds, then I remembered the turquoise paint I used in my big boys room, and added some of that and some black and a little bit of tan so it had a more gray or dirtier look to it. It turned out just right!

Sunday, August 15, 2010

[a simple pillow]

My name is Mindy and I am a pillow-holic. It's a sickness I have. I have so many pillows I can't even display them at once. Some are functional, some are nice to look at, but I can't seem to get rid of any, and I'm always adding to the collection.


I found this great fabric a few months ago while looking for a good re-upholstery option. I fell in love with it, and I finally decided what to do with it.


I love how it coordinates with the pillows on the couch.

This is in my "informal" formal living room. :) It's not even the next room on my list, but I couldn't help but change up the pillows a bit.

And because I have decorating ADD, I jumped ahead of myself and did things out of order again. I really just need to finish our Master Bedroom, but I decided to do something else on Saturday instead. It may or may not involve the armoire (seen here) in the family room.


And I cannot admit or deny that I may have mixed up my own paint color (if in fact I did, it was surely out of true necessity , a.k.a. I picked the wrong color!)

The good news is all I have left to do is some distressing and I should have a little sumpthin' sumptin' to show you in the next few days.

And then maybe I'll get back on task... maybe.

Friday, August 6, 2010

big boy's room!

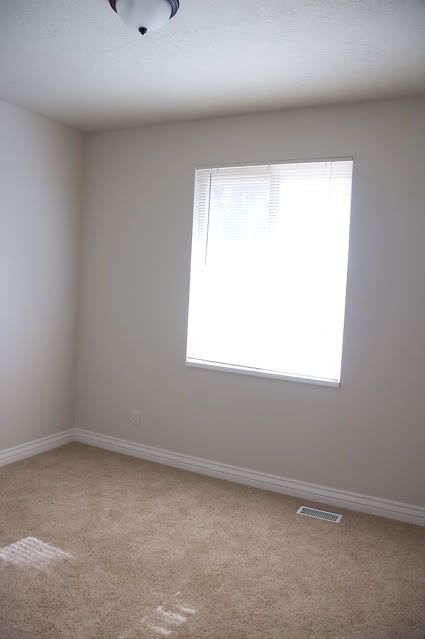
here's the before...


and just to be fair, this was before we moved in obviously, but still... very ordinary beige room.

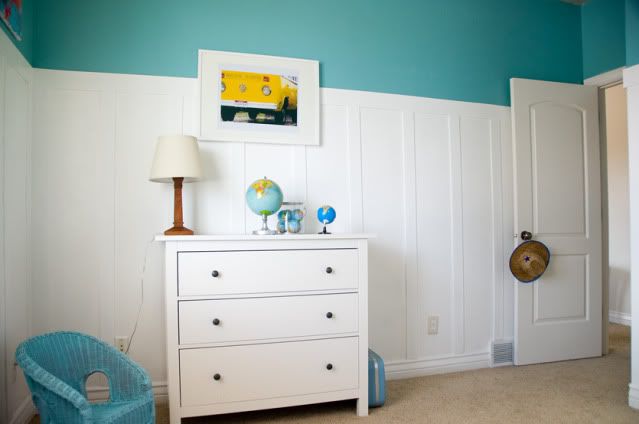
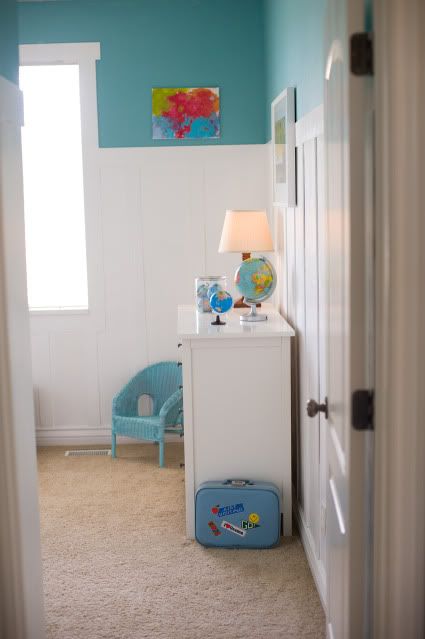
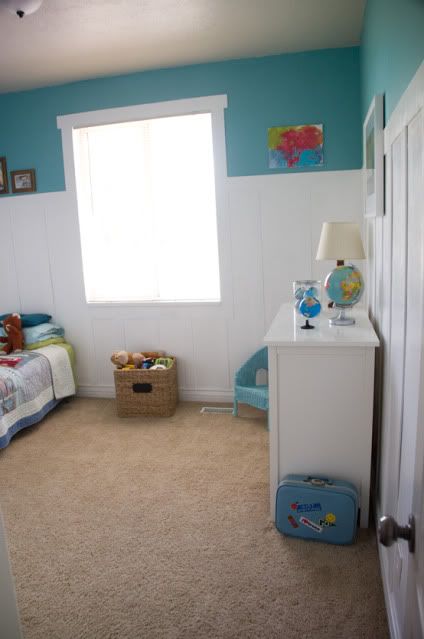
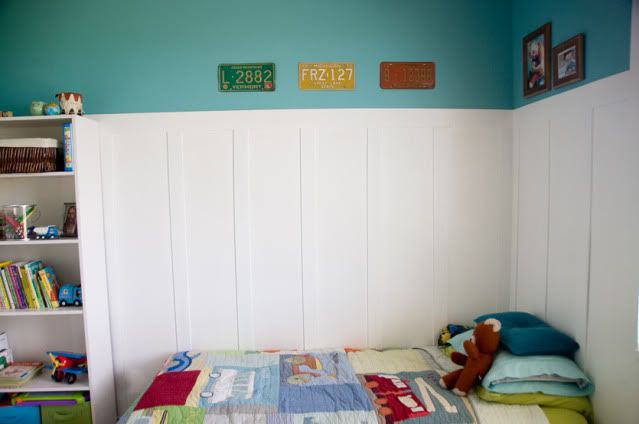
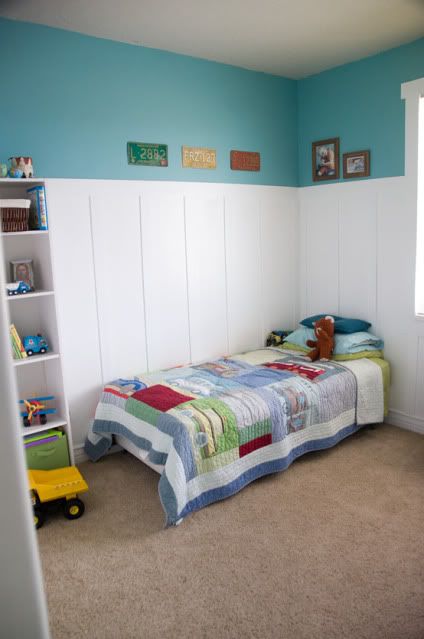
And now here is his new room!

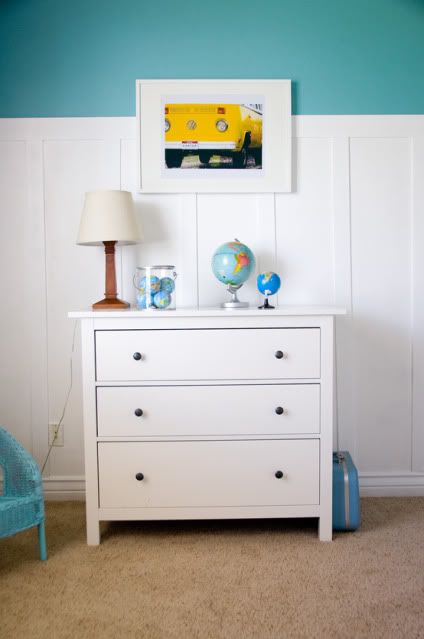
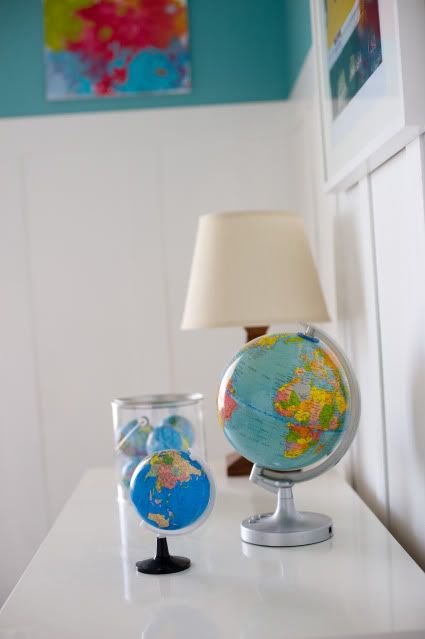
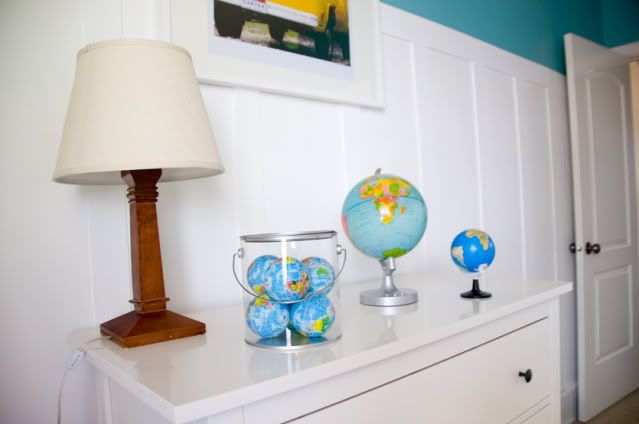
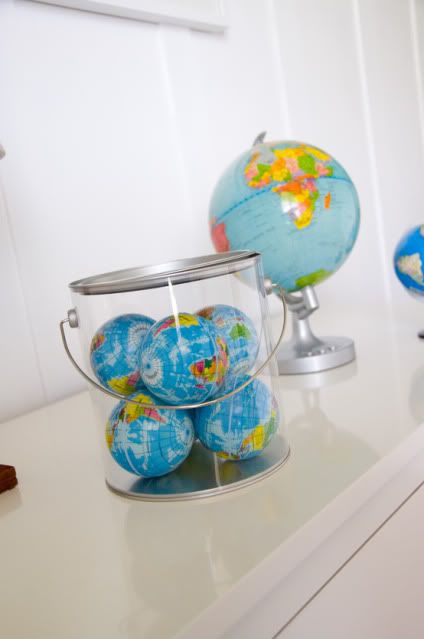
He has a fascination with globes, so I wanted to find a way to incorporate those, and the colors go so well with what I had in mind for his space.

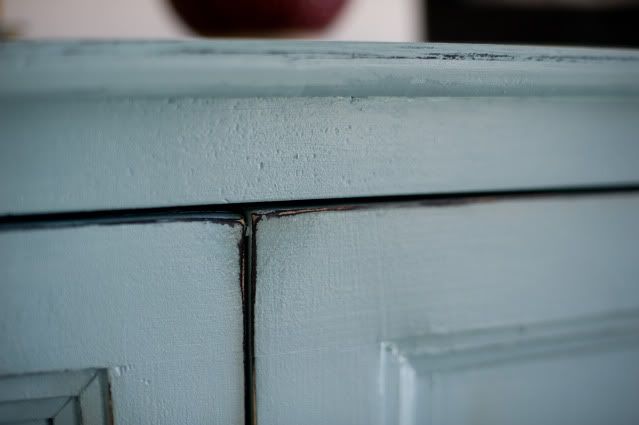
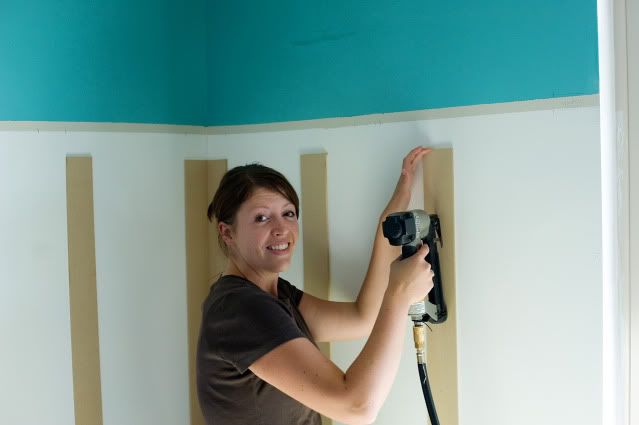
The board and batten turned out to be no big deal, I'll share the details in a later post.

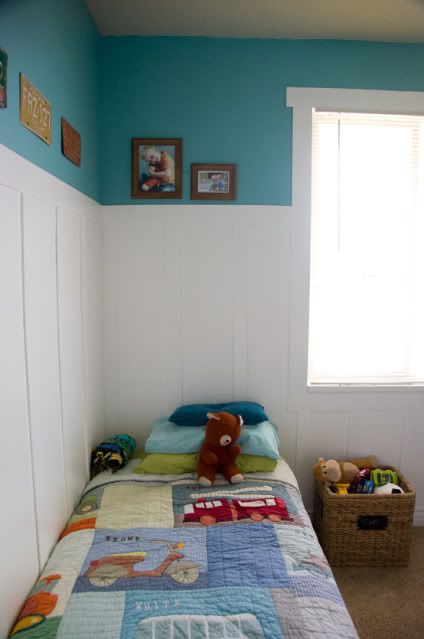
Trimming the windows always makes a huge difference. I'm a big fan of thick white mouldings, I go gaga for trims.


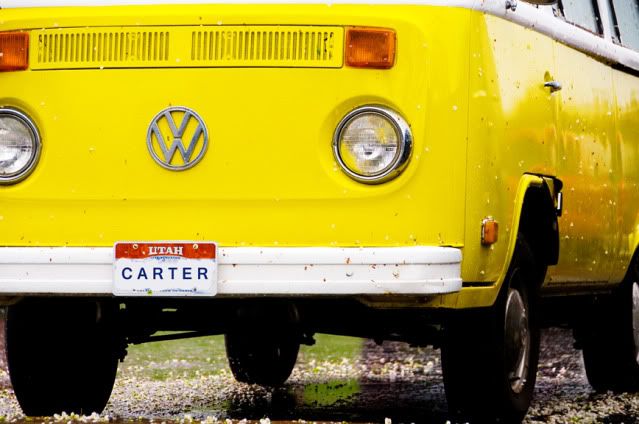
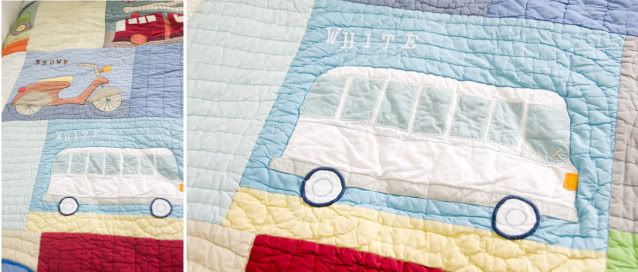
The "hippie bus" was in a parking lot of a nearby museum when I was on an outing with the boys one day. Lucky for me, I had my camera with me, so I took some detailed pictures (looking like a crazy person out in the rain with a big DSLR camera in the rain). I knew immediately I would use this one in his room.


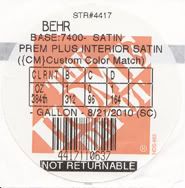
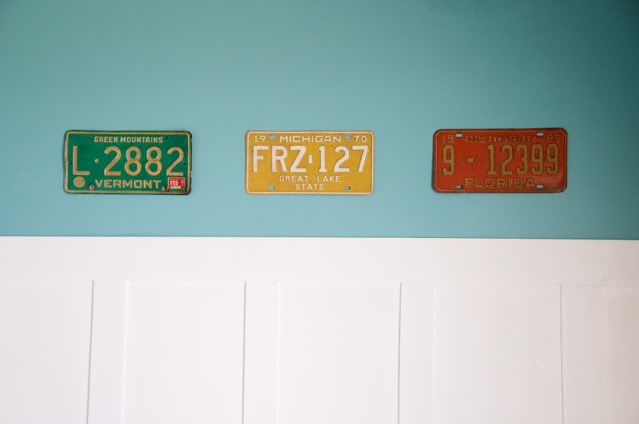
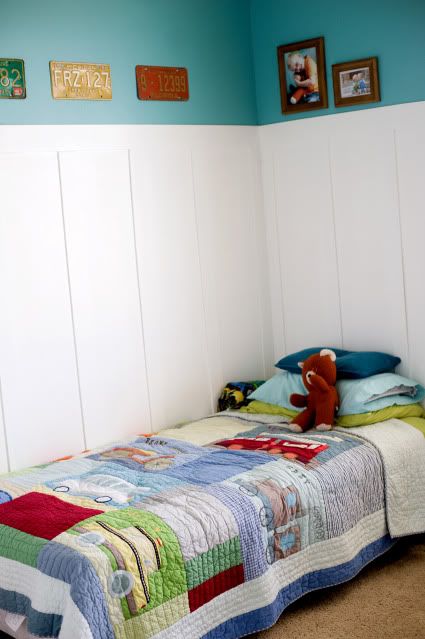
I found all of the License plates on ebay. I bought them purely for their colors, I didn't even care which states they where. They are one of my favorite parts of his new room.


One of my biggest goals throughout the process was to not forget that 
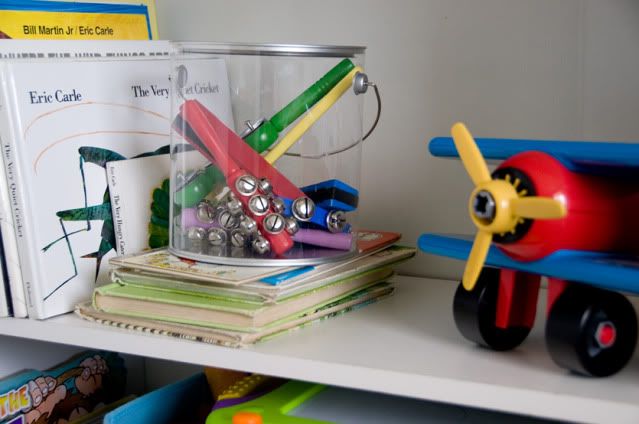
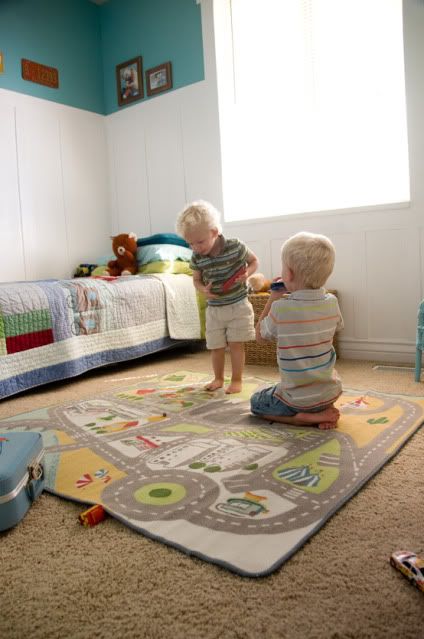
a little boy lives here. A little boy plays here, this is his space, and more than being a pretty room, it needs to function for him. I happily embrace toys on the floor and all around. I don't care if he moves things around and does his thing in here. So I tried to leave all of his things accessible to him. I did put the puzzles with smaller pieces up high, mostly so his baby brother doesn't come in and loose parts to games, or eat them. :)


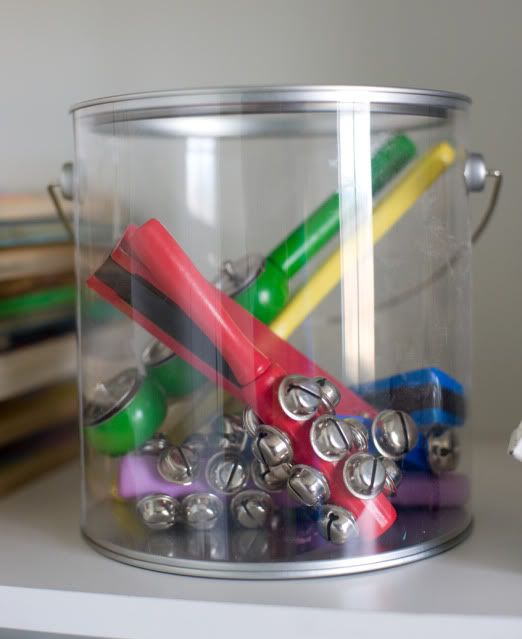
I decided to move these instruments down to a lower shelf so he and his brother can just play with them whenever they want. I love nothing more than to hear them making music and being the crazy little fellas that they are.

The bedding is from Land of Nod, I've loved this set for a while now, but I wanted to be so careful not to make his room too theme-y. I found the quilt on ebay for $55. It's originally over $150, so I think I did pretty well on that!


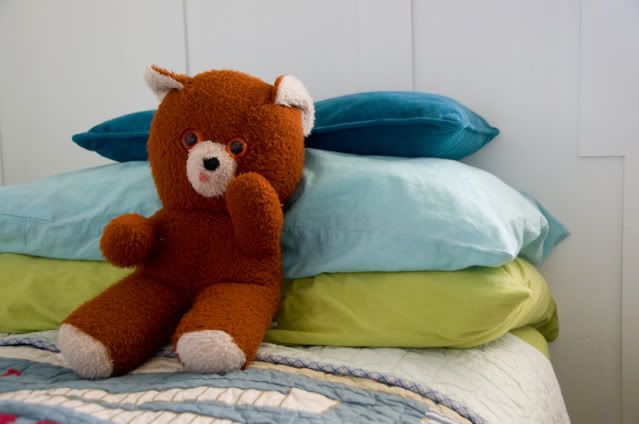
We had to add some fun vintage items that belonged to my husband and I when we were little. "Scotty Bear", the bear on his bed, was my husband Scott's when he was a little boy. We found him in a box in the garage shortly after we moved in. He had been in our basements in our previous homes. It was a good find.
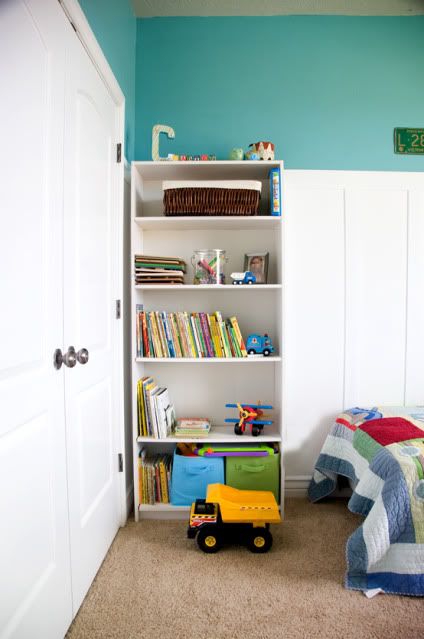
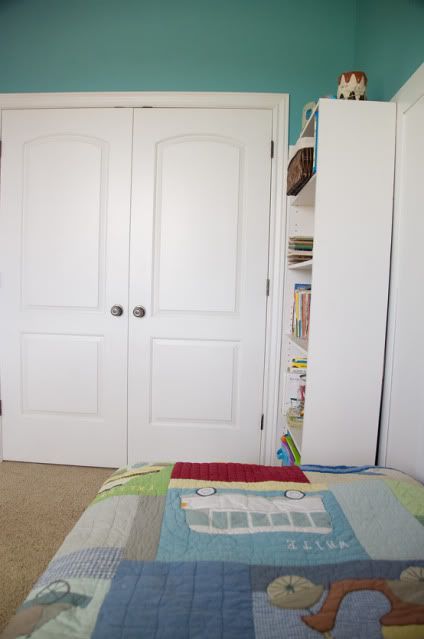
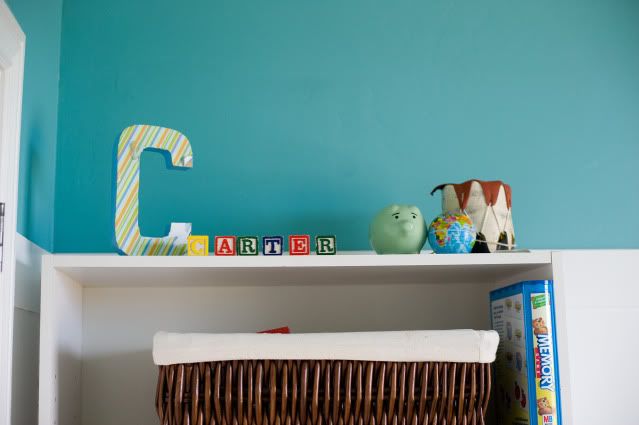
Carter loves Scotty Bear. The little blocks on top of the bookshelf also belonged to my husband as a little boy. The Native American drum on the bookshelf was mine, from a family vacation when I was just about the age he is now, as well as the vintage suitcase I remember taking to sleep at my grandma's house. He now uses it for matchbox cars storage, both of our boys love to lug it around with the cars inside.


The bookshelf needs tweaking again, now that I moved his bucket of instruments and some other things down, it's a little bare up on top, and I'm contemplating some window treatments, but for now I'm calling it good enough.

The most important part is that it's a colorful and fun place to play, because really what else matters? And he loves it! The first day it was all finished he kept telling anyone who would listen "my mom painted on my wall. my mom painted it special for me." I think it passed the Carter test! :)

Most of the time this is what it will be looking like:


And in reality, it's gonna be a whole lot worse.

And I'm just fine with that!