Don't forget about the $10 off coupon for everyone else!
Wednesday, February 22, 2012
winner!
Congratulations to Heidi! You are the winner of the My Memories Design Suite giveaway!
Don't forget about the $10 off coupon for everyone else!
Don't forget about the $10 off coupon for everyone else!


Friday, February 17, 2012
my memories design suite GIVEAWAY!

I'm so excited to share this with you! I was contacted My Memories to host a great giveaway! We're giving away the My Memories Design Suite. What is My Memories, you may ask?
It's an award winning digital scrapbook software that is extremely easy and fun to use. My Memories Suite is rated #1 by Amazon and TopTen Reviews. Using this software, anyone can create digital scrapbooks, photobooks, cards, calendars and gifts without having to buy expensive and complicated software programs.
I'm especially excited about this, because I take LITERALLY thousands of photos every year of my kids, and I print less than 10% of the photos I take. I've made it a goal this year to get all of those photos printed into photobooks and scrapbooks so we can enjoy them!
I decided to give it a whirl, and got right to work playing around with my copy of the software, and found it easy to use and versatile.
I made a photobook spread of some recent pictures I took of my baby Noah last week. (He's 6 months old already!)
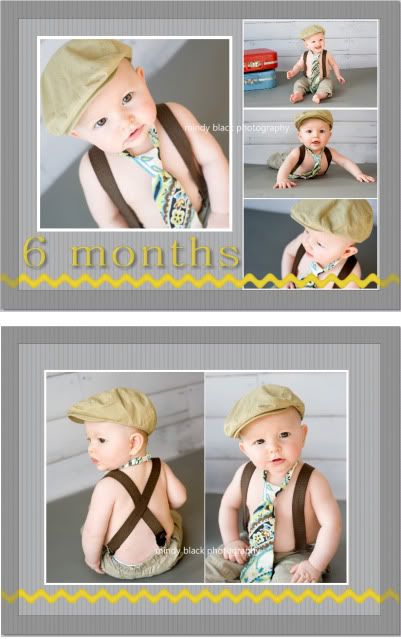 This is what I came up with while exploring the software in just a few minutes. It was fun! I can't wait to put the rest of the pictures in and actually PRINT them!
They have lots and lots of background choices, embellishments, text, journaling options and layouts. It was fun and easy! And it's not just for scrapbooking... you can do so much more with this! It would be great to use for calendars and cards and anything else you can dream up!
So, here's the BEST PART!
We are giving the My Memories suite to one of you!
Just head on over to My Memories and take a gander at all of the good stuff they have to offer. Come back and let me know what you think of it! Tell me about your favorite paper pack or layout, or anything that you see and LOVE! Leave a comment, and you're entered.
*giveaway ends Tuesday, Feb 21, 12AM MST. Winner will be announced Wednesday morning!
Also, as a special for all of my readers, they are giving a $10 discount off the purchase of the My Memories Suite Scrapbook software and a $10 coupon for the MyMemories.com store!
| |
Tuesday, January 31, 2012
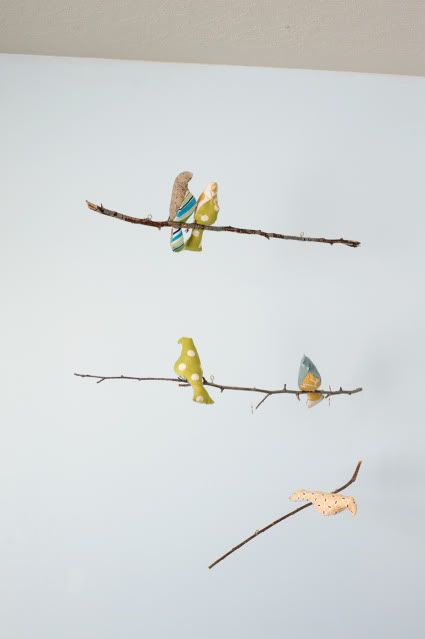
mister blue bird {bird mobile}
I made some little friends for Noah to gaze at while he's falling asleep in his crib... or let's just admit it, I made this for me to look at when I nurse him in his room. :)
 I've been ogling bird mobiles for a few years now, and when I saw the pattern for these birds (here) I knew it was high time I get sewing.

 I'm so happy with the way it turned out. The best part is, he actually likes it too. He likes to look up and "talk/sing" to them when he's having a diaper change or when he wakes up from a nap.
 As far as sewing projects go, this one was pretty simple. I was intimidated before I started... at first glance I didn't get how the two parts of the pattern where supposed to go together (did I ever mention that I really hate sewing from a pattern? My brain is backward. I'm so much better off If I just make it up on my own. It's a personal problem.)
I pinned them together very "thoroughly"... I mean, seriously, you think I have enough pins here?
 You may laugh, but it helped me to keep it all where it needed to be. The funnest part was matching up the fabrics. Mis-matching might be a better term. I love them in their non matchi-ness.
 The hardest part was probably deciding where to put the eyelet hooks, so that each branch would balance properly. I also used a swivel clasp (fishing paraphernalia thing, I am the daughter and granddaughter of avid fishermen, after all) to help them move and bob a little better, if I tap it they do, indeed, have a "swivel" action... not a rotate in a 360 degrees action, that would have taken a little more ingenuity. But we like it just the same.
Little Mister seems to think it's pretty great.
 It's still in progress, but here's a peek at the other corner of the room:
 I'm thinking I'll give the legs on this chair some love, but other than that, I love her as she is.
I have a few more things in the works (painting the crib? gasp! curtains and wall art) and some ideas swirling around in the 'ol noggin that are not yet in the works, but soon this room will be done. I know, I'm slow. But it's not fair... bedrest from 24ish weeks on kind of foils plans, and now with three fellas five and under (and none in school yet) I'm a busy busy momma these days, my creative juices are having a hard time being concentrated on one task or project, but I'm happy and enjoying these simple days with my little ones. I'm a lucky momma! And maybe I'll actually get this room finished before the little guy is two, wouldn't that be amazing?
Check out the free bird mobile pattern HERE.
 I've been ogling bird mobiles for a few years now, and when I saw the pattern for these birds (here) I knew it was high time I get sewing.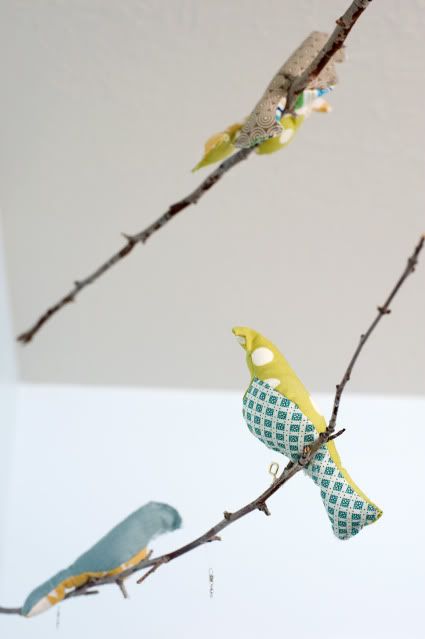
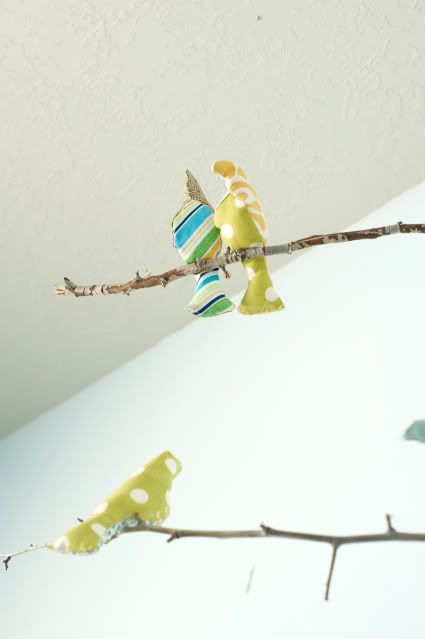 I'm so happy with the way it turned out. The best part is, he actually likes it too. He likes to look up and "talk/sing" to them when he's having a diaper change or when he wakes up from a nap.
 As far as sewing projects go, this one was pretty simple. I was intimidated before I started... at first glance I didn't get how the two parts of the pattern where supposed to go together (did I ever mention that I really hate sewing from a pattern? My brain is backward. I'm so much better off If I just make it up on my own. It's a personal problem.)
I pinned them together very "thoroughly"... I mean, seriously, you think I have enough pins here?
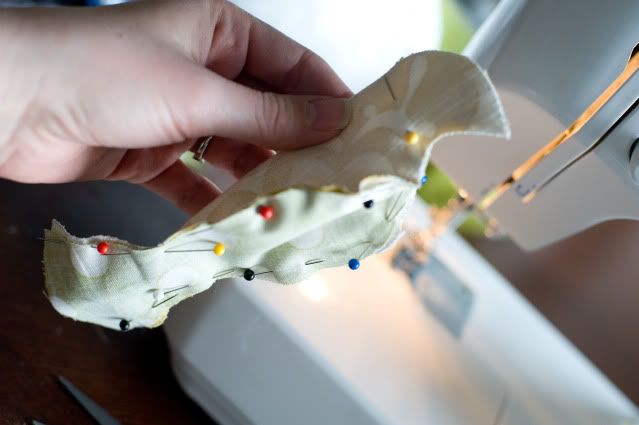 You may laugh, but it helped me to keep it all where it needed to be. The funnest part was matching up the fabrics. Mis-matching might be a better term. I love them in their non matchi-ness.
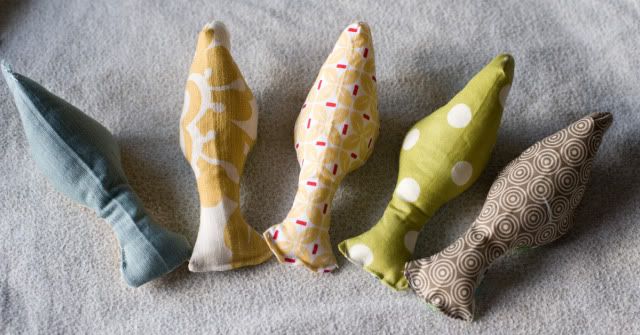 The hardest part was probably deciding where to put the eyelet hooks, so that each branch would balance properly. I also used a swivel clasp (fishing paraphernalia thing, I am the daughter and granddaughter of avid fishermen, after all) to help them move and bob a little better, if I tap it they do, indeed, have a "swivel" action... not a rotate in a 360 degrees action, that would have taken a little more ingenuity. But we like it just the same.
Little Mister seems to think it's pretty great.
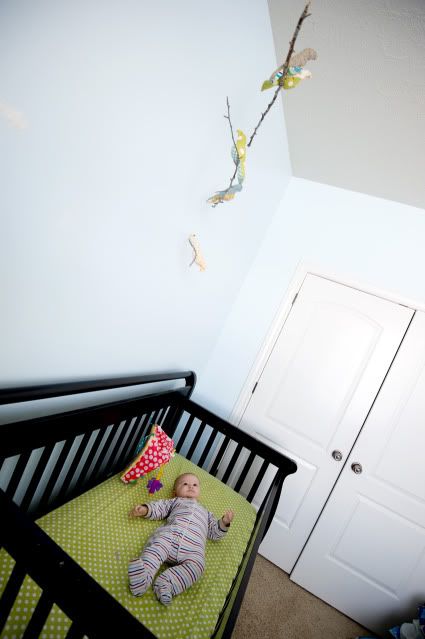 It's still in progress, but here's a peek at the other corner of the room:
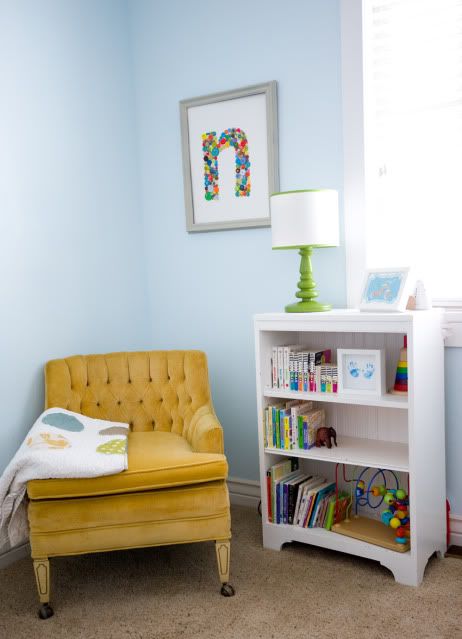 I'm thinking I'll give the legs on this chair some love, but other than that, I love her as she is.
I have a few more things in the works (painting the crib? gasp! curtains and wall art) and some ideas swirling around in the 'ol noggin that are not yet in the works, but soon this room will be done. I know, I'm slow. But it's not fair... bedrest from 24ish weeks on kind of foils plans, and now with three fellas five and under (and none in school yet) I'm a busy busy momma these days, my creative juices are having a hard time being concentrated on one task or project, but I'm happy and enjoying these simple days with my little ones. I'm a lucky momma! And maybe I'll actually get this room finished before the little guy is two, wouldn't that be amazing?
Check out the free bird mobile pattern HERE.
Sunday, November 20, 2011
Better Homes and Gardens Feature!
My Christmas Mantel from last year was featured on Better Homes and Garden's website!

It's been up since April and I forgot to post about it until I was reminded of it yesterday! Thanks, Better Homes and Gardens for the honor, I'm flattered to be featured and flabbergasted to be in the company of some of my favorite home bloggers. I've always loved BHG, subscribed to the magazine for 7 years now and never imagined any of my projects would be BHG worthy. I'm just a mommy.
This is me feeling awfully sheepish... :)
I've had a lot of emails asking how it held up to being stored. Honest answer is: I didn't even attempt it. It was so dried out by the end of the season, it looked pretty sad by the time I took it down. I'm deciding if I want to attempt it again or do something entirely different this year. We do Christmas colorful at our house and the wheels are turning...
I love Thanksgiving, and I think it deserves to be celebrated before busting the Christmas out, so I'll continue to enjoy the last of fall before a single light or wreath goes up, but that doesn't stop me from thinking about it!
Go check out the feature for some gorgeous Christmas inspiration!

It's been up since April and I forgot to post about it until I was reminded of it yesterday! Thanks, Better Homes and Gardens for the honor, I'm flattered to be featured and flabbergasted to be in the company of some of my favorite home bloggers. I've always loved BHG, subscribed to the magazine for 7 years now and never imagined any of my projects would be BHG worthy. I'm just a mommy.
This is me feeling awfully sheepish... :)
I've had a lot of emails asking how it held up to being stored. Honest answer is: I didn't even attempt it. It was so dried out by the end of the season, it looked pretty sad by the time I took it down. I'm deciding if I want to attempt it again or do something entirely different this year. We do Christmas colorful at our house and the wheels are turning...
I love Thanksgiving, and I think it deserves to be celebrated before busting the Christmas out, so I'll continue to enjoy the last of fall before a single light or wreath goes up, but that doesn't stop me from thinking about it!
Go check out the feature for some gorgeous Christmas inspiration!
Monday, November 7, 2011
Enter to Win a FREE Seat at our photography workshop- A $150 Value!
I tend to keep my photography business very separate from this blog, but thought I would let you all know that I'm teaching a photography workshop this month with my good friend Holly. We are doing a giveaway for a free spot, you've got about one hour to go over and enter for it HERE! I realize most of my readership is outside of Utah, but if you win and want to transfer it to someone who is in the area we are happy to do that!


Monday, October 31, 2011
Monogram Button Art
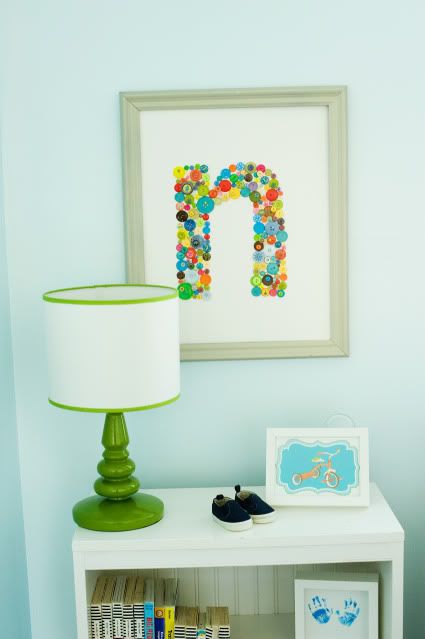
I made a little goal for myself that the four hours a week when my oldest boys are at preschool, that I'll try really hard not to use that time for cleaning, or other household chores. I decided that I need to use that time for creating, since these days I don't get as much of that as I would like. The addition of our third little fella has been wonderful, I can't get enough of him, but I'm still working on achieving balance all over again.
This is one of my little creations during preschool/momma project time.
My favorite section is this little part with the little "n" that looks like a typewriter letter. See it down there?


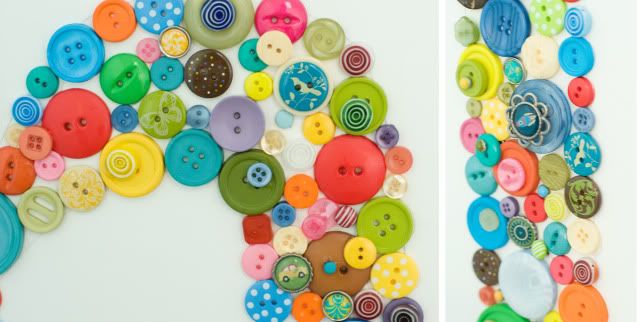 Since I'm only working with a two hour time slot (they go for two hours on Tuesday and two hours on Thursdays) I didn't want to waste time taking pictures of the process, but here are the details:
I started with:
* a big 16x20 piece of art board or mat board. It needs to be thick to hold the weight of the buttons and glue.
* glue. I think it was 3m project glue or something like that. I bought it at Target. It dries in less than a minute. Bonds paper, plastic metal, etc. Tacky glue would work. Maybe hot glue, although it would make a stringy mess.
* Buttons and brads. lots and lots of buttons. A few scrap book elements and brads to fill in and add depth and dimension, and a few glass beads for fun.
I free handed a lower case "n" for my baby Noah. I just drew it on with pencil. Then I did a rough lay out of where the buttons should go. This took a while, but it was actually pretty therapeutic. Playing with bright colorful buttons is a great stress reducer!
It was pretty easy, and I love the playful color it adds to his room. I'm pretty darn close to finishing up the odds and ends and calling his room finito.
Idea from American Crafts, go here for more details.
Saturday, October 29, 2011
Dresser Before and After
A few years ago (right before we moved, actually) Scott's mom gave us this old dresser that belonged first to his Great Grandma Harris, and then he and his brother used it as kids. It even had red crayon marks to prove it, not sure if those are courtesy Scott or Michael, but it was funny to see that.
I was really excited to aquire it for it's history and for it's curves. I love the serpentine design of the drawers. It's really a cute piece of furniture.
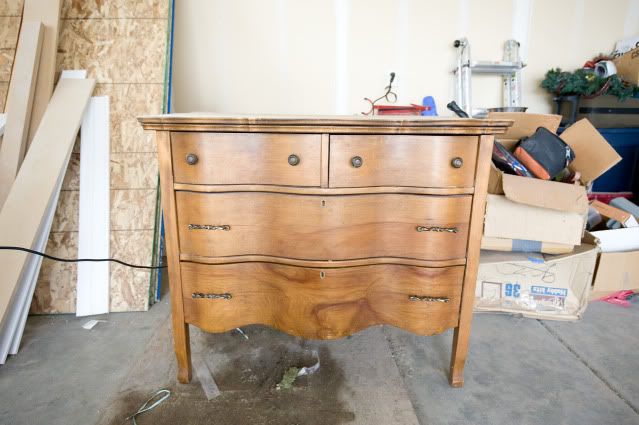
Before:
 After:


It was in rough shape. Well built, but had seen better days, for sure. The drawer fronts where coming apart at the joints and some of the back supports where loose, causing the whole thing to shift and the drawers to not be able to slide in. One whole side was barely hanging on. I really wanted to save it. It took me this long to get around to it, and to know what to do with it, but I basically took it apart and reassembled it, banged on it with a hammer and eventually got it all put back together and working. I'm proud to say, the drawers now slide in and out with ease and it didn't fall apart when Scott and I packed it in the house and down the stairs. Let's just say, the thing was dang heavy. They just don't make 'em like they used to.
I had to sand down the entire top to get around some water damage.

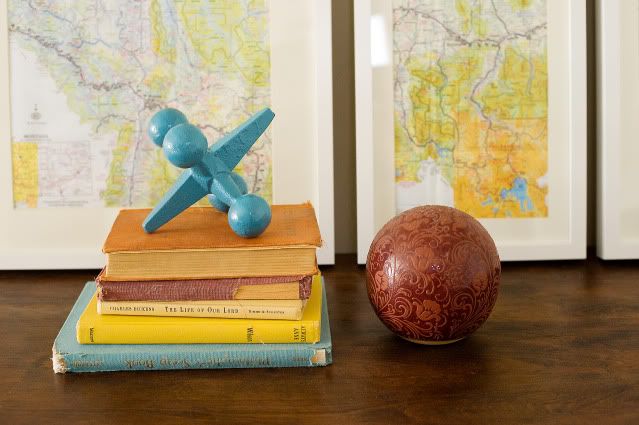
 I then restained the top in a dark walnut and used the same white we have on all of our trims and wood work in the house. I think the white really made the hardware pop. I wouldn't dream of replacing those old tarnished brass knobs.
The plan is to use this dresser in the new basement to house all of our games and puzzles. Perfect storage, and it gives the space a lot of character. It really needed something "old" to mix with all of the new.
I was really excited to aquire it for it's history and for it's curves. I love the serpentine design of the drawers. It's really a cute piece of furniture.
Before:
 After: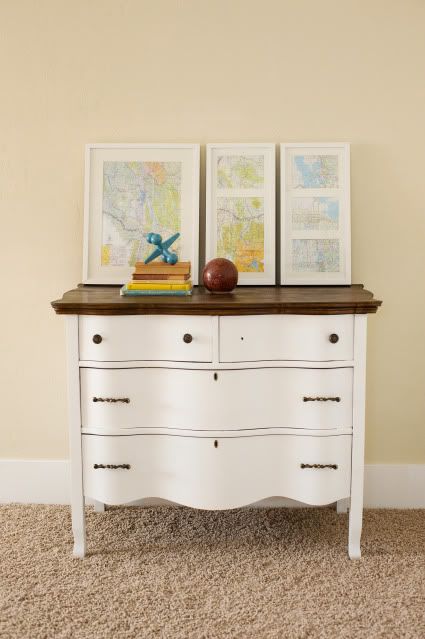
It was in rough shape. Well built, but had seen better days, for sure. The drawer fronts where coming apart at the joints and some of the back supports where loose, causing the whole thing to shift and the drawers to not be able to slide in. One whole side was barely hanging on. I really wanted to save it. It took me this long to get around to it, and to know what to do with it, but I basically took it apart and reassembled it, banged on it with a hammer and eventually got it all put back together and working. I'm proud to say, the drawers now slide in and out with ease and it didn't fall apart when Scott and I packed it in the house and down the stairs. Let's just say, the thing was dang heavy. They just don't make 'em like they used to.
I had to sand down the entire top to get around some water damage.
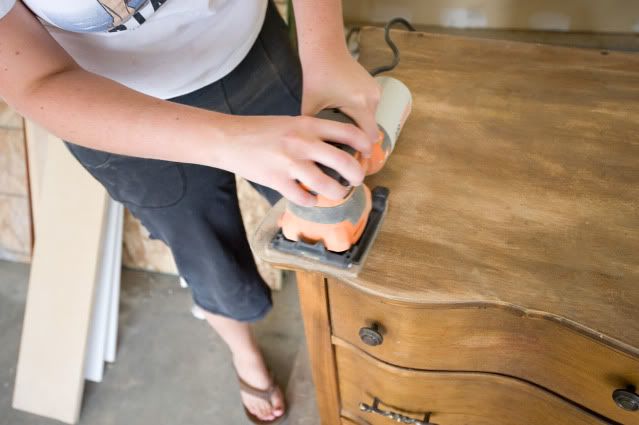
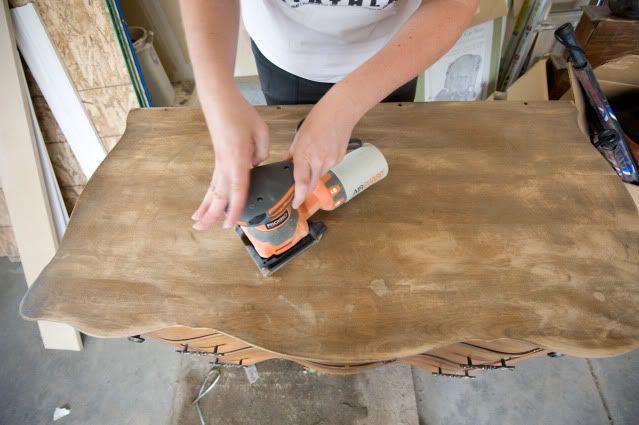 I then restained the top in a dark walnut and used the same white we have on all of our trims and wood work in the house. I think the white really made the hardware pop. I wouldn't dream of replacing those old tarnished brass knobs.
The plan is to use this dresser in the new basement to house all of our games and puzzles. Perfect storage, and it gives the space a lot of character. It really needed something "old" to mix with all of the new.
Wednesday, September 28, 2011
stair gallery

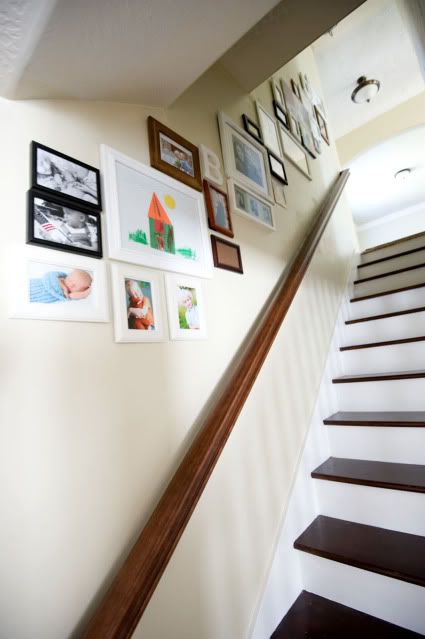
It took a few weeks, but I finally got it done. I've been dreaming of this since we decided to open up the stair case! I've been collecting and saving these frames for about two years now.
Brace yourselves... and don't judge. I might be going for the world record in the category of "Number of Photos Displayed in a Single Dwelling". They're all over my house, but I like it that way.
Let's call this the before:
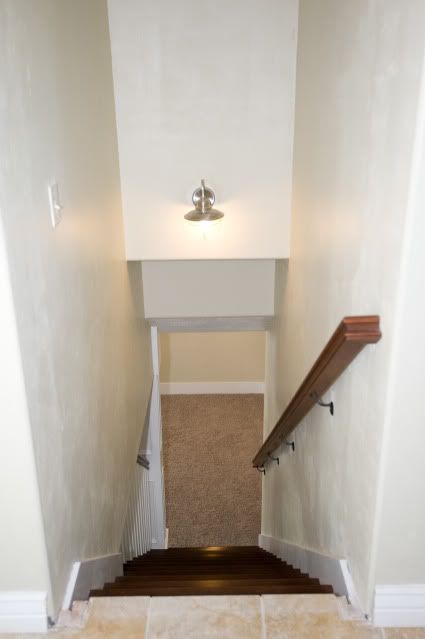
After:
We love it!!! I love the way that photographs instantly personalize a space. I had some helpers, who were so excited to see the pictures of our family and some of their art work go up on the wall.


 I heard my oldest boy (he's almost five) tell a buddy as they were headed down to play: "Hey! Look! I made that house! It's my house I made for my mom... and she HUNG IT UP!"
It put a smile on my face to see him being so proud of something he made, and so pleased that it was on the wall for all of us to enjoy.


I love the pictures, but this little set of three little hands is probably my favorite part right now.

 Most of these pictures where already in the frames, just waiting for a spot to be displayed, although, as you can see, I have a few empty frames waiting for new pictures. I'll get to that soon (I hope) I have a few in mind.
Gallery walls can be tricky. I kind of approached this in a haphazard way. I just dug all of my frames out of the closet where they were being stored and started playing with them on the floor. I made a newspaper template (a la young house love, what a great idea!) of each frame and then taped them to the wall before I drove in a single nail.

I ended up moving things around a little, but stuck with the initial placing I had come up with on my floor. The hardest part was starting (as usual) and once I got going it went up fairly quickly.

I love that it helps to tie the upstairs to the downstairs, it makes it feel a lot more inviting. Now I can't wait to get going on personalizing the basement.
I was initially planning to paint all of the frames white, or a mix of white, green and blue frames. My hubby votes to keep the whites and mixed woods just as it is. So far a few of my friends who have also seen it vote to keep the mixed look. I could go either way. What do you think?
Monday, September 12, 2011
the basement!
When I was hospitalized in April, we were really, really close to finishing the basement. By the time I came home in May, the carpet was in and most of the left over things were done. I've intended to show a little peek of the basement for a while now, but I've been on a bit of a blog hiatus of sorts. I just don't have time to sit at the computer any more!
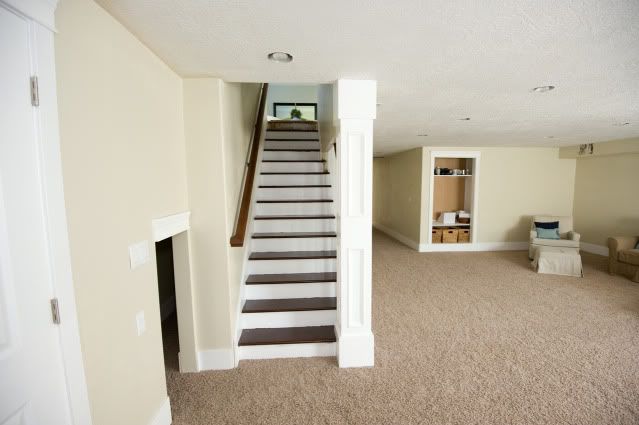
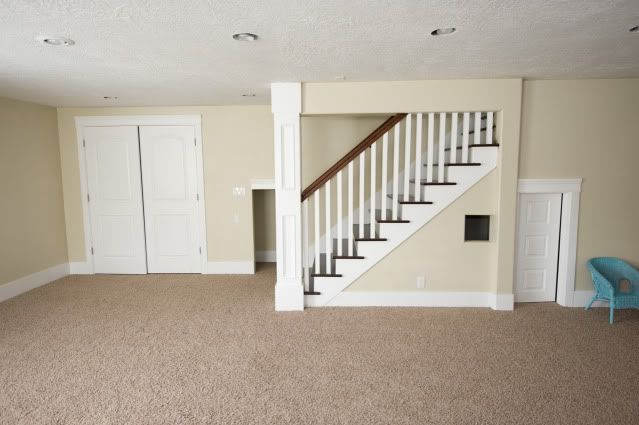
We have been enjoying this space for the last few months though! I LOVE the extra closet space, it's fun to have a place to hang out and play together as a family, and I look forward to making the space cozy and decorating it up, it's still very utilitarian and quiet plain right now, but it's another thing on my "things to do when life settles down and I have free time again" list. We have some loose ends, little bits to finish off here and there, but it's pretty much done.
Anyway... here it is!


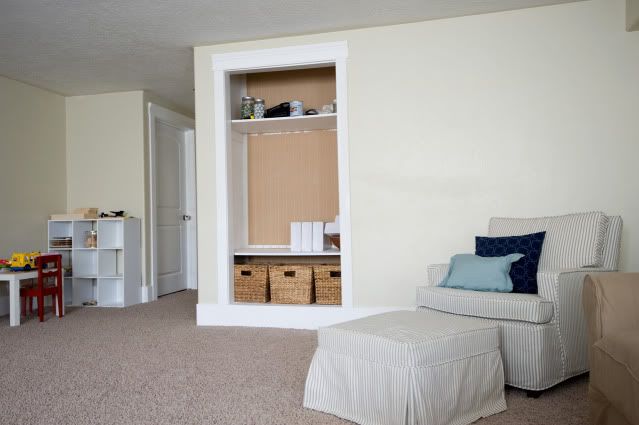
The built in bookshelf shown below has already progressed. We finally found time to paint the bead board back. It's looking great! I'll share that another time.
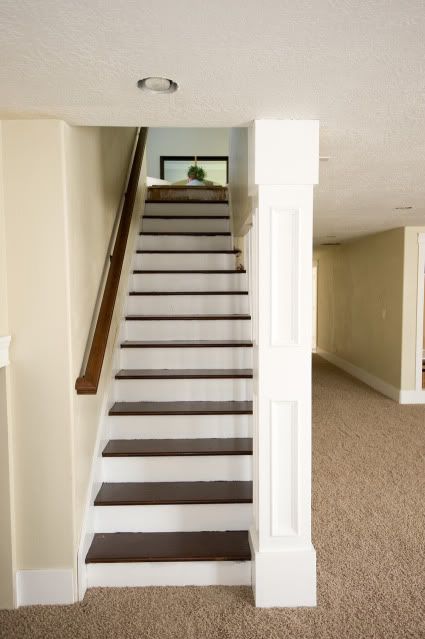
 The stairs are my favorite part of the whole basement!


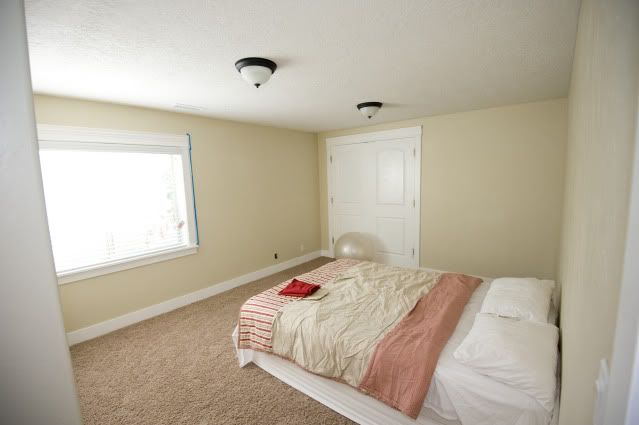
Guest room/possible craft space? Still deciding if I want to take over a corner of this room for sewing and crafting. I made that comforter the year I met Scott (8 years ago) with my own two hands and my sewing machine. It's been in storage for most of our marriage. I pulled it out and decided I'm not sure if I'll end up using it anyway, but for now it's better than just a sheet.

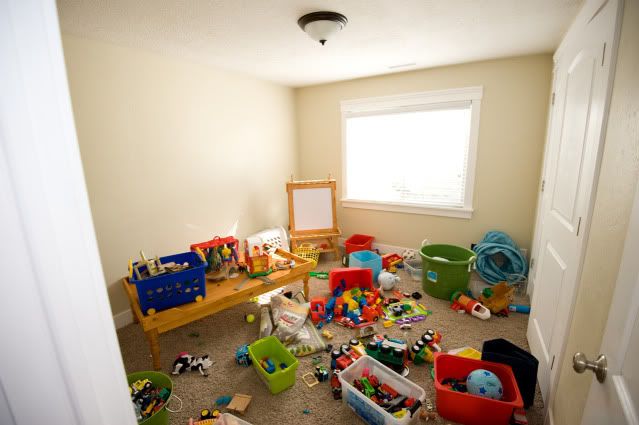
Keepin' it real. This is what the toy room looks like 80% of the time. And it's ok with me. They've been having a lot of fun in there!


 And here's a preview of the next big thing for us:
 Yep, we're certifiably insane. This is just a piece of it though. Removing that door frame going down the stairs left a spot where there was no flooring. That's okay because we've got plans...
When we bought this house, we knew we would be wanting a larger dining area. The time has come. With three little fellas, we now need a larger table than the little 4 seater (with adorable x-back chairs) that was our very first furniture purchase together just after we were engaged. We are maxed out. We want and need a larger table with room for our growing family (and room to expand for when we have guests). So... we're adding on the the back of our house and making our dining room larger! It's going to change the whole look of the back side of our house, and I'm so excited for the possibilities it opens up for our kitchen.
I've disliked the tile from day one, and with the addition in the works, we decided it would be a good time to rip all of that tile out, along with the light colored carpet in the bedrooms, family room and living room. We'll replace it with a dark hardwood that will blend with the wood on the stairs. We had hardwood throughout the entire upstairs in our old house and we loved it. I can't wait for this project! We're in the planning stages right now, and hope to start sometime in the spring. But for now, back to the basement...
We love it, it's been so nice to use all of the space in our home instead of just living out of half of it. This was our second basement finishing in a two year time span. I'm happy to say, we'll be enjoying this one much longer than we did the last. The office still has some work going on, but I'll for sure share it as we get 'er done!
We have been enjoying this space for the last few months though! I LOVE the extra closet space, it's fun to have a place to hang out and play together as a family, and I look forward to making the space cozy and decorating it up, it's still very utilitarian and quiet plain right now, but it's another thing on my "things to do when life settles down and I have free time again" list. We have some loose ends, little bits to finish off here and there, but it's pretty much done.
Anyway... here it is!
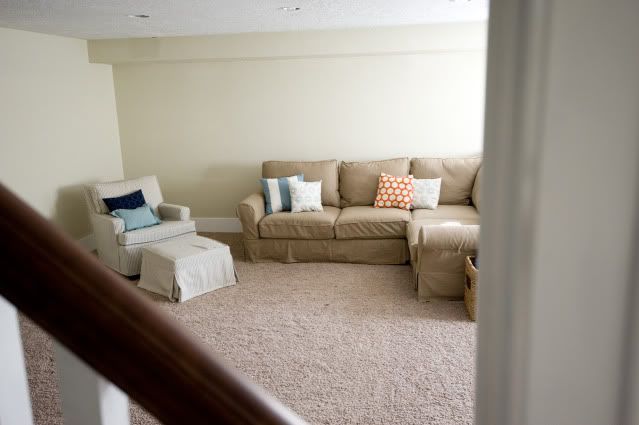
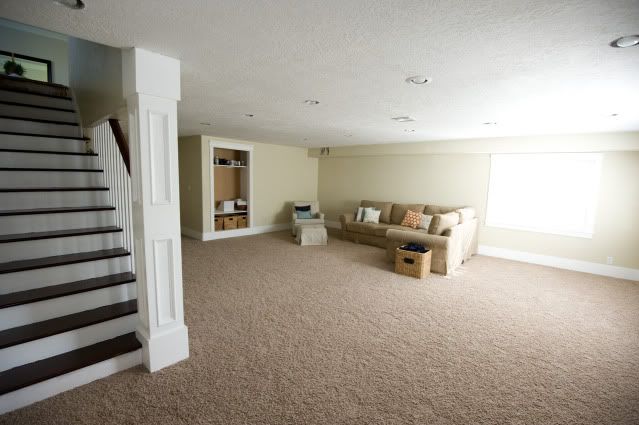
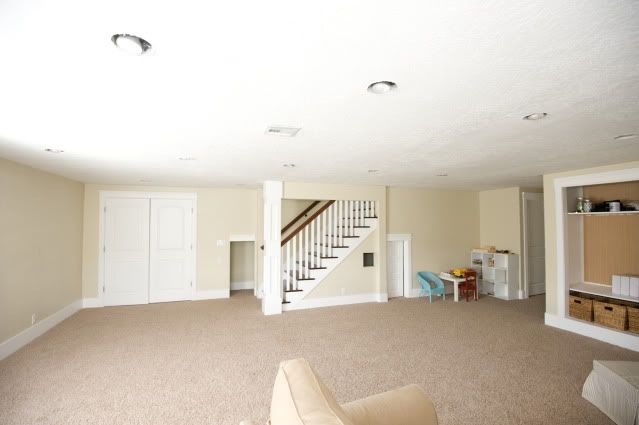
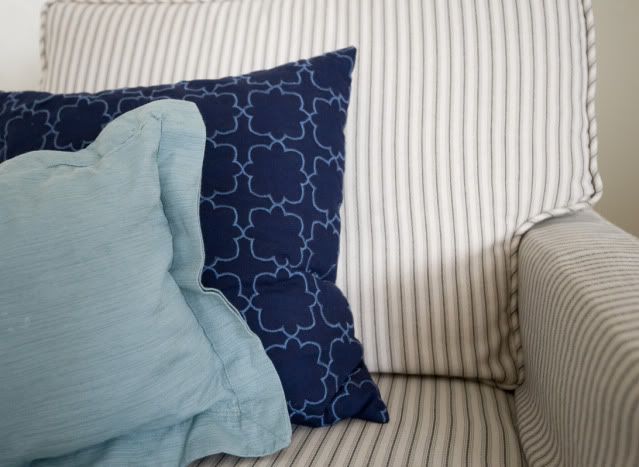
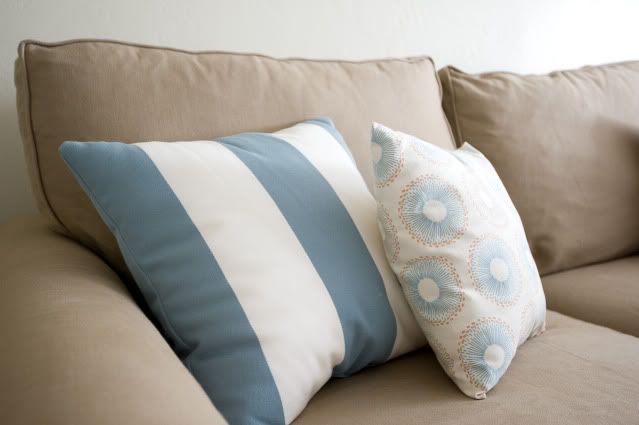
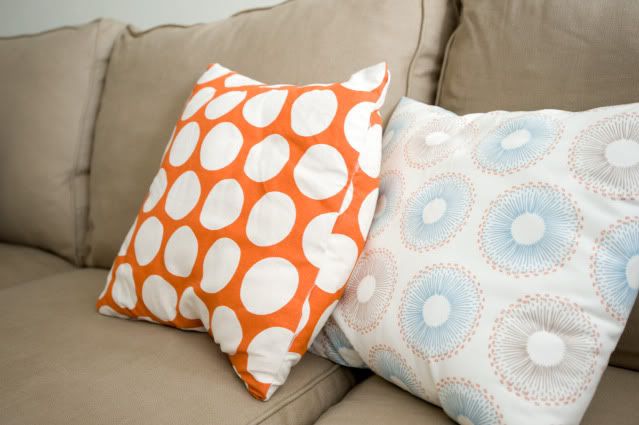
The built in bookshelf shown below has already progressed. We finally found time to paint the bead board back. It's looking great! I'll share that another time.
 The stairs are my favorite part of the whole basement!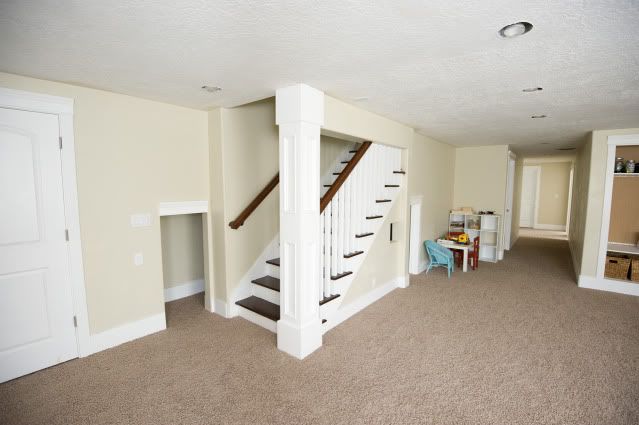
Guest room/possible craft space? Still deciding if I want to take over a corner of this room for sewing and crafting. I made that comforter the year I met Scott (8 years ago) with my own two hands and my sewing machine. It's been in storage for most of our marriage. I pulled it out and decided I'm not sure if I'll end up using it anyway, but for now it's better than just a sheet.
Keepin' it real. This is what the toy room looks like 80% of the time. And it's ok with me. They've been having a lot of fun in there!
 And here's a preview of the next big thing for us:
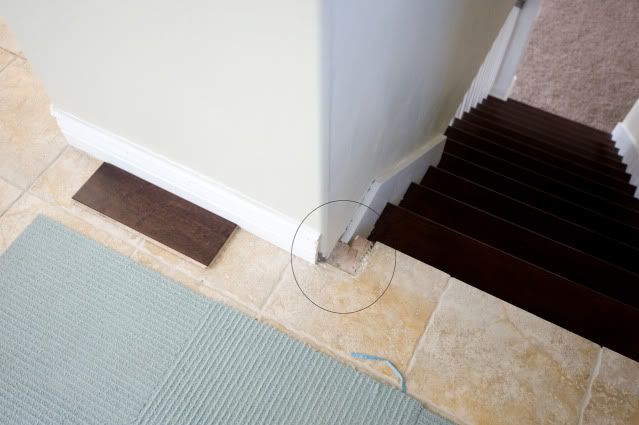 Yep, we're certifiably insane. This is just a piece of it though. Removing that door frame going down the stairs left a spot where there was no flooring. That's okay because we've got plans...
When we bought this house, we knew we would be wanting a larger dining area. The time has come. With three little fellas, we now need a larger table than the little 4 seater (with adorable x-back chairs) that was our very first furniture purchase together just after we were engaged. We are maxed out. We want and need a larger table with room for our growing family (and room to expand for when we have guests). So... we're adding on the the back of our house and making our dining room larger! It's going to change the whole look of the back side of our house, and I'm so excited for the possibilities it opens up for our kitchen.
I've disliked the tile from day one, and with the addition in the works, we decided it would be a good time to rip all of that tile out, along with the light colored carpet in the bedrooms, family room and living room. We'll replace it with a dark hardwood that will blend with the wood on the stairs. We had hardwood throughout the entire upstairs in our old house and we loved it. I can't wait for this project! We're in the planning stages right now, and hope to start sometime in the spring. But for now, back to the basement...
We love it, it's been so nice to use all of the space in our home instead of just living out of half of it. This was our second basement finishing in a two year time span. I'm happy to say, we'll be enjoying this one much longer than we did the last. The office still has some work going on, but I'll for sure share it as we get 'er done!
Subscribe to:
Posts (Atom)